
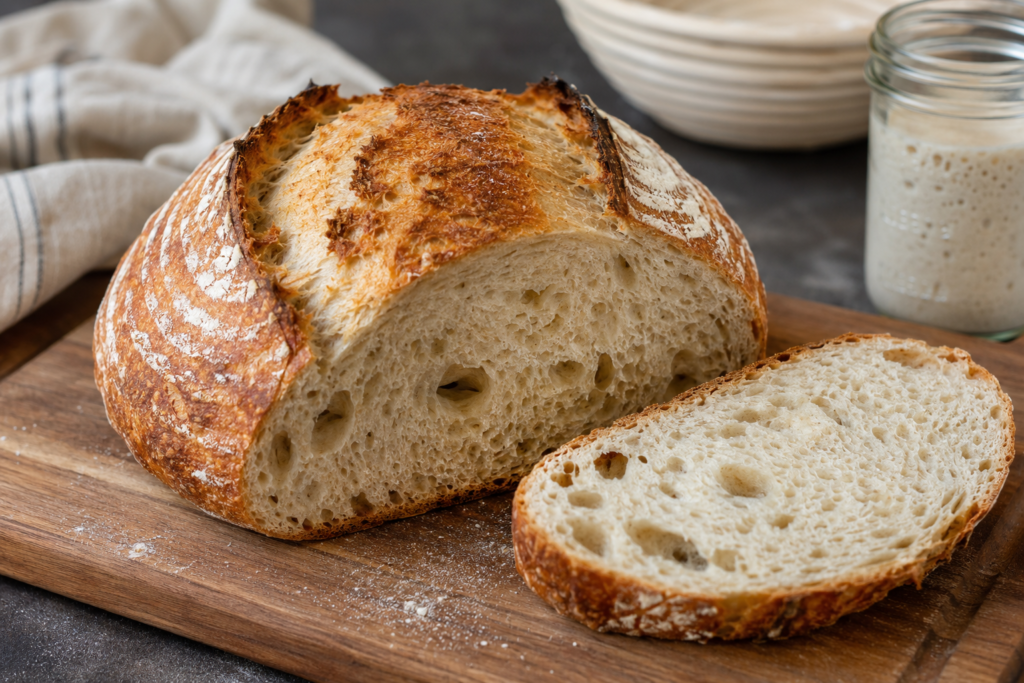
Some sourdough recipes make you feel like you need a spreadsheet, three timers, and a degree in bread science just to bake a loaf.
I’ve tried those recipes.
A few worked beautifully. A few left me staring at a sticky mess on my countertop wondering what went wrong.
After years of baking sourdough at home, I realized something important: the loaf I bake most often is not the fanciest one. It’s the simple, reliable loaf that fits into real life.
No special flour blends.
No complicated hydration calculations.
No exhausting schedules.
Just a strong starter, good bread flour, a few stretch and folds, an overnight cold proof, and a hot Dutch oven.
This is the sourdough recipe I return to week after week because it consistently produces a loaf with a crisp crust, chewy crumb, and the classic flavor that makes homemade sourdough so satisfying.
The best part is that once you understand the rhythm of this dough, you stop obsessing over the clock and start learning what healthy dough actually looks and feels like.
Why This Recipe Works So Well
One thing I learned early in my sourdough journey is that every step matters, even when the recipe looks simple.
This loaf relies on a few basic principles:
- A strong active starter provides natural fermentation.
- Bread flour creates strength and structure.
- Stretch and folds develop gluten without kneading.
- Bulk fermentation allows flavor and gas production.
- Overnight cold proof improves taste and handling.
- A hot Dutch oven creates steam and oven spring.
Nothing here is complicated.
But every step serves a purpose.
That balance is what makes this recipe reliable enough for everyday baking.
Recipe Overview
Yield: 1 loaf
Best For: Everyday sourdough bread
Texture: Crisp crust and chewy crumb
Flavor: Mildly tangy classic sourdough
Proofing Method: Overnight cold proof
Bake Method: Dutch oven
Difficulty: Beginner to Intermediate
Ingredients
For One Loaf
- 160g active starter
- 240g water
- 400g King Arthur bread flour
- 8g salt
For Two Loaves
- 320g active starter
- 480g water
- 800g King Arthur bread flour
- 16g salt
If your family is anything like mine, doubling the recipe is usually a smart idea. Fresh sourdough disappears surprisingly fast.
Understanding the Ingredients
Active Starter
A healthy starter is the foundation of good sourdough.
Before mixing your dough, your starter should be bubbly, airy, and close to its peak rise.
One mistake I made when I first started baking sourdough was using starter that looked active but wasn’t actually strong enough. The result was dense bread that barely rose.
Now I always wait until the starter has clearly doubled and smells pleasantly tangy before using it.
Water
Room-temperature water works perfectly for this recipe.
If your kitchen is cool, slightly warmer water can help fermentation move along.
If your kitchen is hot, cooler water can slow things down.
Avoid hot water because it can damage the natural yeast and bacteria in your starter.
Bread Flour
This recipe uses King Arthur bread flour because of its higher protein content.
That extra protein helps develop gluten, giving the dough strength and helping the loaf rise taller in the oven.
Salt
Salt does more than improve flavor.
It strengthens gluten, regulates fermentation, and helps create better dough structure.
Skipping salt can leave your bread tasting bland and can cause the dough to ferment too quickly.
Step 1: Mix the Dough
Start by combining the active starter and water in a large mixing bowl.
Stir until the starter completely dissolves and the water looks cloudy.
This helps distribute the starter evenly throughout the dough.
Add the bread flour and salt.
Mix until a shaggy dough forms.
At this stage, the dough will probably look rough, sticky, and uneven.
That’s exactly how it should look.
Make sure there are no dry pockets of flour hiding at the bottom of the bowl.
Cover the bowl and let it rest for one hour.
Step 2: Let the Dough Rest
This first rest period often gets overlooked, but it makes a huge difference.
During this time, the flour absorbs water and gluten begins developing naturally.
The dough relaxes and becomes much easier to work with.
Resist the urge to keep touching it.
No kneading.
No folding.
No checking every few minutes.
Just let it rest.
After an hour, you’ll notice the dough feels smoother and stretches much more easily.
Step 3: Stretch and Fold
After the one-hour rest, begin your stretch-and-fold sets.
Perform four sets total, spaced thirty minutes apart.
To perform one set:
- Wet your hands lightly.
- Grab one side of the dough.
- Stretch it upward gently.
- Fold it over the center.
- Rotate the bowl.
- Repeat on all four sides.
Cover the dough and wait thirty minutes before the next set.
Each set gradually strengthens the dough without aggressive kneading.
By the final set, you’ll notice a dramatic difference.
The dough becomes smoother, stronger, and more elastic.
Why Stretch and Folds Matter
Stretch and folds create the structure needed to trap gas during fermentation.
Without enough structure, the dough can spread outward instead of rising upward.
One lesson I learned is that stretching harder doesn’t make better bread.
Gentle folds work better than forcing the dough.
The goal is strength without tearing.
Step 4: Bulk Fermentation
After the final fold, cover the bowl and let the dough ferment at room temperature.
This stage usually takes between four and six hours.
But here’s something every sourdough baker eventually learns:
The clock is only a rough guideline.
Your dough doesn’t know what the recipe says.
Temperature, starter strength, and humidity all affect fermentation.
Instead of watching the clock, watch the dough.
Look for signs like:
- Increased volume
- Visible bubbles
- A smoother surface
- A light, airy feeling
- Gentle jiggle when the bowl moves
When the dough looks alive and inflated, it’s ready.
Signs Bulk Fermentation Is Complete
A properly fermented dough should:
- Be noticeably larger
- Feel lighter than before
- Show bubbles around the sides
- Jiggle slightly when moved
- Release from the bowl more easily
Learning this stage changed my sourdough results more than any other skill.
Step 5: Shape the Dough
Turn the dough onto a lightly floured surface.
Shape it into either a boule (round loaf) or batard (oval loaf).
Focus on creating surface tension without tearing the dough.
Place the shaped dough seam-side up into a floured banneton.
Don’t have a banneton?
A bowl lined with a well-floured kitchen towel works surprisingly well.
Cover the dough before refrigerating.
Step 6: Cold Proof Overnight
Place the shaped loaf in the refrigerator overnight.
This is one of my favorite parts of the process because most of the work is already finished.
While you sleep, the dough slowly develops deeper flavor.
The cold proof also makes the dough easier to score and handle the next day.
Many of the best-tasting sourdough loaves I’ve baked came after a long overnight proof.
Step 7: Preheat the Dutch Oven
The next day, place your Dutch oven inside the oven and preheat to 500°F (260°C).
Don’t rush this step.
The Dutch oven needs to become thoroughly heated.
A blazing hot Dutch oven creates steam and provides the intense heat needed for strong oven spring.
That sudden burst of heat helps create the dramatic rise and beautiful crust that sourdough bakers love.
Step 8: Score and Bake
Remove the dough from the refrigerator.
Turn it onto parchment paper.
Using a bread lame or sharp blade, score the top confidently.
Transfer the dough into the hot Dutch oven.
Bake covered at 500°F for 25 minutes.
Remove the lid.
Reduce oven temperature to 475°F.
Bake uncovered for another 20 minutes.
The loaf is finished when it develops a deep golden-brown crust and sounds hollow when tapped on the bottom.
Why the Covered Bake Matters
Steam is critical during the first stage of baking.
The lid traps moisture released from the dough.
This prevents the crust from setting too early and allows maximum expansion.
That’s where oven spring happens.
Once the lid comes off, the crust begins browning and crisping.
Both stages are equally important:
- Covered bake for rise
- Uncovered bake for crust
Step 9: Cool Before Slicing
This may be the hardest step of all.
The smell of fresh sourdough filling the kitchen makes it incredibly tempting to cut immediately.
I’ve done it many times.
Every time I regretted it.
The crumb continues setting after baking.
Cutting too soon often creates a gummy interior.
Allow the loaf to cool on a wire rack for at least one to two hours before slicing.
Patience pays off here.
Common Sourdough Mistakes to Avoid
Using a Weak Starter
A sluggish starter often leads to dense bread.
Always make sure your starter is active and doubling consistently.
Ending Bulk Fermentation Too Early
Under-fermented dough feels heavy and tight.
Give it enough time to become airy and lively.
Over-Fermenting the Dough
If the dough becomes extremely loose, sticky, and collapses easily, it may have gone too far.
Cutting the Bread Too Soon
Fresh bread smells amazing, but waiting improves both texture and flavor.
Adding Too Much Flour
Many beginners try to fix sticky dough by adding extra flour.
This can throw off hydration and affect the final texture.
Use wet hands during folds instead.
Troubleshooting Common Problems
Why Is My Dough So Sticky?
Some stickiness is completely normal.
Extremely sticky dough can indicate over-fermentation or insufficient strength development.
Why Did My Loaf Turn Out Flat?
Flat loaves often result from:
- Weak starter
- Overproofing
- Poor shaping
- Insufficient gluten development
Why Is My Crumb Gummy?
Usually caused by:
- Under-fermentation
- Underbaking
- Slicing too early
Why Didn’t My Dough Rise Much?
Your starter may not have been active enough, or the dough may simply need more fermentation time.
Watch the dough, not the clock.
Frequently Asked Questions
Can I Use All-Purpose Flour?
Yes, but bread flour generally produces better structure and oven spring.
Do I Need a Dutch Oven?
No, but it is the easiest way to create steam and achieve professional-looking results.
Can I Cold Proof Longer Than Overnight?
Yes. Many bakers successfully proof dough for 12–24 hours in the refrigerator.
Should I Let the Dough Warm Up Before Baking?
No.
Bake directly from the refrigerator.
Cold dough is easier to score and usually holds its shape better.
Recipe Card
Ingredients
- 160g active starter
- 240g water
- 400g King Arthur bread flour
- 8g salt
Instructions
- Mix starter and water until dissolved.
- Add flour and salt. Mix into a shaggy dough.
- Cover and rest for 1 hour.
- Perform 4 sets of stretch and folds, 30 minutes apart.
- Bulk ferment 4–6 hours until airy and jiggly.
- Shape into a loaf.
- Place into a floured banneton.
- Refrigerate overnight.
- Preheat Dutch oven to 500°F.
- Score the dough.
- Bake covered for 25 minutes.
- Reduce temperature to 475°F.
- Bake uncovered for 20 minutes.
- Cool completely before slicing.
Final Thoughts
The reason this recipe stays in my regular baking rotation is simple: it works.
It doesn’t require fancy ingredients or advanced techniques. It gives the dough enough time to develop naturally, and it rewards patience with a loaf that looks beautiful and tastes even better.
Once you learn how this dough behaves during bulk fermentation and shaping, you’ll stop relying on exact timelines and start trusting what you see in front of you.
That’s when sourdough baking becomes less stressful and a lot more enjoyable.
And before long, this reliable everyday loaf might become the bread you bake every single week.



Love this. Clear instructions.
I’m addicted to baking sourdough but I’m still learning. I’m following your recipe tomorrow.
Thank you for making it seem more simple. Sourdough baking can seem to be mind boggling sometimes.