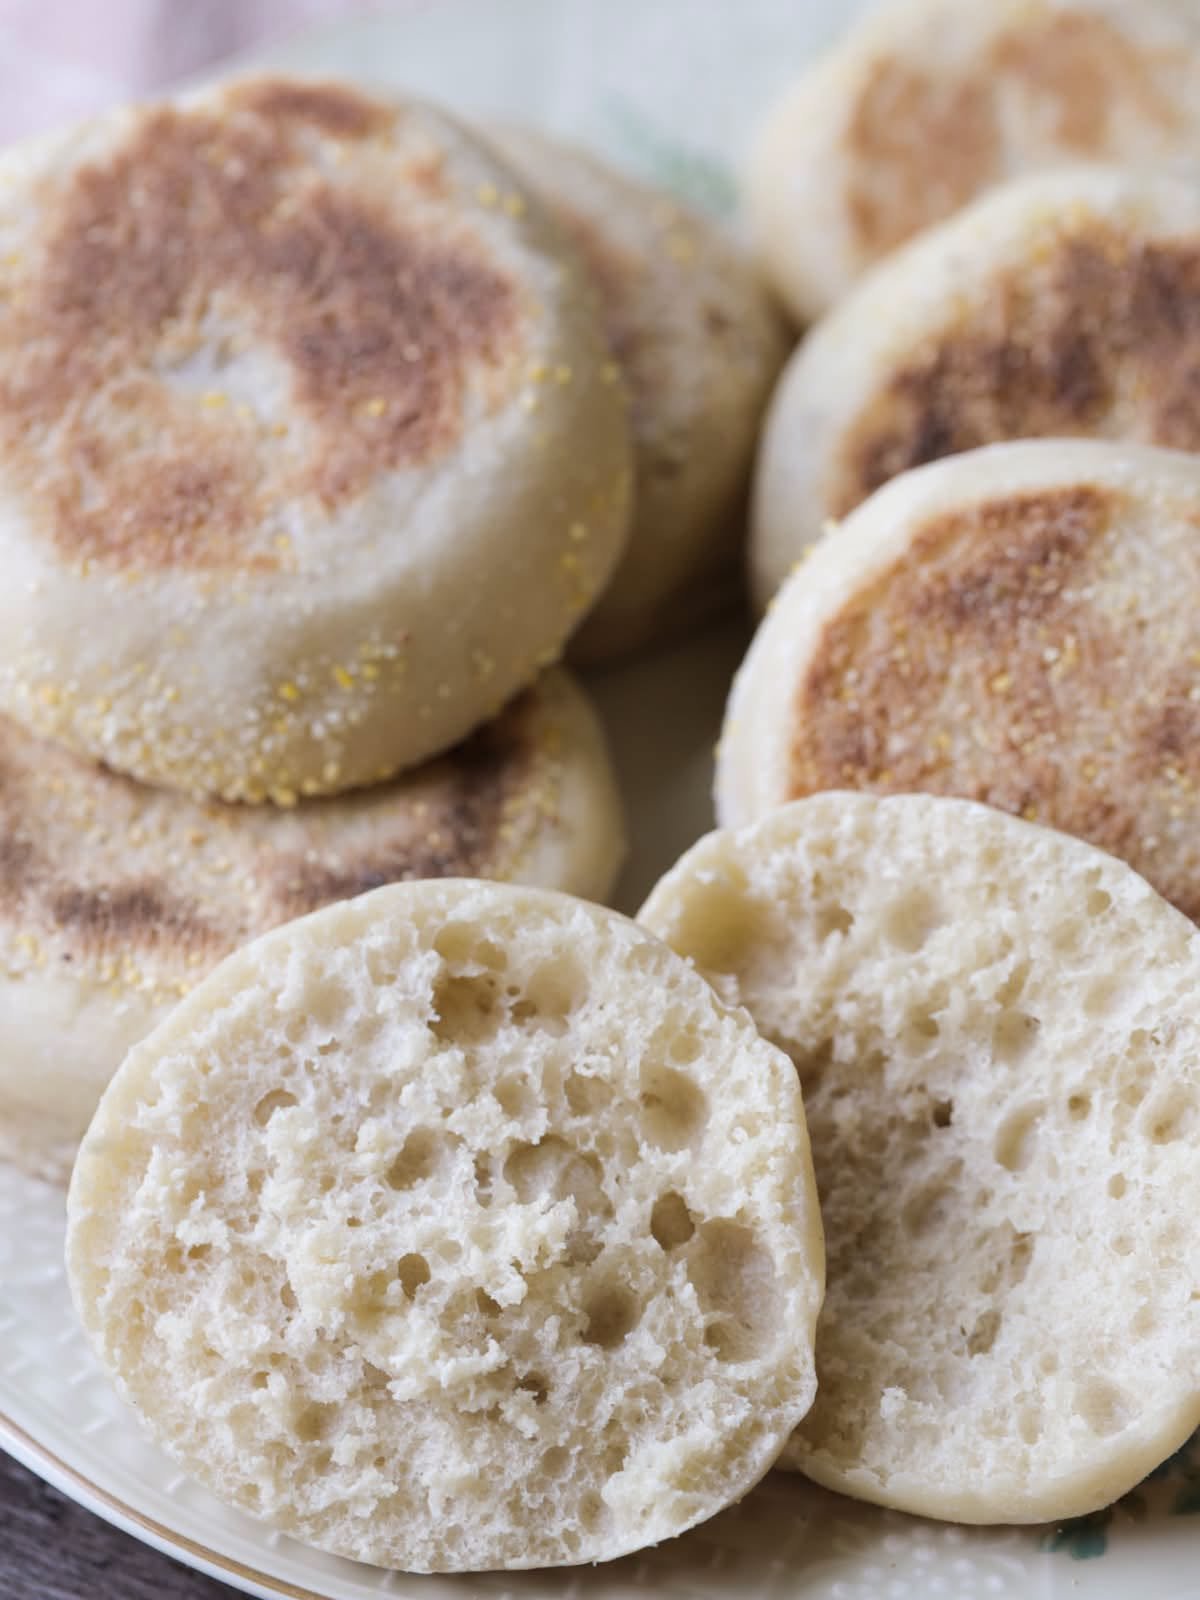
There is something about homemade English muffins that makes a regular breakfast feel a little special. The first time you split one open and see those soft little air pockets inside, then toast it until the edges turn crisp, you quickly understand why people keep making this recipe for years.
I especially like this recipe because it uses ingredients that are already common in most kitchens. There is no complicated equipment, no stand mixer required, and you don’t need a special English muffin pan. A basic griddle or heavy skillet works just fine.
These muffins have a lightly crisp, golden outside while the inside stays soft and chewy. Toast one with butter, spread it with cream cheese and jam, or use it as the base for a breakfast sandwich.
The recipe makes about 18 muffins, so it is also a great option when you want to prepare breakfast for several days.
Why Homemade English Muffins Are Worth Making
Store-bought English muffins are convenient, but homemade ones have a different texture. They are fresh, slightly chewy, and have a pleasant cornmeal-coated crust.
Another thing I like about this recipe is that the muffins are cooked on a griddle rather than baked in an oven. That means you don’t have to heat the whole kitchen just to make breakfast.
The biggest difference comes from cooking them slowly. If the heat is too high, the outside can become dark before the center has had enough time to cook. Medium heat is your friend here.
Ingredients You’ll Need
Here is what you need for approximately 18 homemade English muffins:
- 1 cup milk
- 2 tablespoons white sugar
- 1 cup warm water
- 1 packet active dry yeast (about 2 ¼ teaspoons)
- 6 cups all-purpose flour
- ¼ cup melted shortening
- 1 teaspoon salt
- ¼ cup cornmeal, plus extra for dusting
A Note About the Flour
Six cups of flour is the starting point, but don’t add everything blindly if your dough already feels right.
Flour can behave differently depending on the brand, humidity, and how it is measured. The finished dough should be soft and workable rather than extremely stiff.
If you add too much flour, the muffins can turn out heavy instead of light and chewy.
How to Make English Muffins Step by Step
1. Warm the Milk
Pour the milk into a small saucepan and warm it until it begins to bubble around the edges.
Remove it from the heat and stir in the sugar until dissolved.
Let the milk cool until it is lukewarm.
This cooling step is important. Very hot milk can interfere with the yeast later, so don’t rush this part.
2. Activate the Yeast
Pour the warm water into a small bowl and add the active dry yeast.
Let it sit for about 10 minutes.
The mixture should become creamy or slightly foamy. That’s a good indication that the yeast is active.
If absolutely nothing happens after about 10 minutes, check the temperature of your water and the freshness of your yeast before continuing.
Water that is too hot can damage the yeast, while water that is too cold may slow it down considerably.
3. Start the Dough
In a large mixing bowl, combine:
- The lukewarm milk mixture
- Activated yeast mixture
- 3 cups of flour
- Melted shortening
Mix until the ingredients come together smoothly.
Then add the salt and gradually work in the remaining flour.
Knead until you have a soft dough.
You don’t want a rock-hard dough here. It should feel soft and elastic and should be manageable with lightly floured hands.
4. Let the Dough Rise
Lightly grease a clean bowl and place the dough inside.
Cover the bowl with a clean kitchen towel or plastic wrap and place it somewhere warm.
Let it rise for about 1 hour, or until it has roughly doubled in size.
The exact timing can vary. If your kitchen is cool, the dough may need longer. Don’t worry too much about the clock; look at the dough.
A properly risen dough should look noticeably larger and feel airy.
5. Roll Out the Dough
Once the dough has doubled, gently punch it down to remove some of the excess air.
Transfer it to a lightly floured surface.
Roll the dough to approximately ½-inch thickness.
Now cut out rounds using a biscuit cutter.
If you don’t have one, a drinking glass can work surprisingly well. Just make sure the edge is clean and sharp enough to cut through the dough.
Try to cut the rounds as close together as possible. This reduces the amount of dough that needs to be rerolled.
6. Add the Cornmeal
Sprinkle cornmeal over a sheet of waxed paper or another suitable surface.
Place the dough rounds on top.
Sprinkle a little more cornmeal over the tops.
The cornmeal isn’t just for appearance. It gives the muffins that familiar slightly gritty exterior and helps prevent the dough from sticking.
7. Give the Muffins a Second Rise
Cover the dough rounds and let them rise for about 30 minutes.
This short second rise makes a noticeable difference.
Don’t skip it if you want softer, lighter muffins.
They may not dramatically double in size during this stage, but they should look puffier.
8. Heat the Griddle
Lightly grease a griddle or heavy skillet and heat it over medium heat.
This is one of the most important parts of the recipe.
You don’t want a screaming-hot pan.
English muffins are relatively thick compared with pancakes, so they need enough time for the center to cook before the exterior gets too dark.
9. Cook the Muffins
Carefully place the muffins on the heated griddle.
Cook for approximately 10 minutes on the first side.
Turn them over and cook for another 10 minutes, or until both sides are lightly golden brown and the centers are cooked through.
If the muffins are browning too quickly, lower the heat.
If they remain pale after several minutes and aren’t cooking properly, your pan may not be hot enough.
Cooking a test muffin first is actually a useful trick. It lets you adjust the heat before committing the entire batch to the pan.
The Mistake I Would Avoid: Turning Up the Heat
One of the easiest mistakes with English muffins is assuming that a hotter pan will make them cook faster.
It doesn’t always work that way.
You can end up with a beautifully browned outside while the middle is still doughy.
Medium heat gives the muffins enough time to develop a golden crust while the center cooks.
If your first muffin looks too dark, don’t simply reduce the cooking time. Lower the heat and give the remaining muffins a slower cook.
Another Common Mistake: Adding Too Much Flour
When dough feels sticky, it is tempting to keep adding flour.
I’ve found that this can easily go too far.
A slightly soft dough is much easier to work with than a stiff dough that has been overloaded with flour. Add flour gradually and stop once the dough becomes soft, elastic, and manageable.
Remember that you’ll also be working on a lightly floured surface, so some additional flour will naturally come into contact with the dough.
How to Know When They Are Cooked
The outside should be lightly browned rather than very dark.
The muffins should also feel firm enough to handle without collapsing.
Because the muffins are thick, color alone isn’t always a perfect indicator. If you’re unsure, cook one test muffin and split it open after it has cooled slightly.
If the center looks wet or doughy, lower the heat and cook the next batch longer.
This is much easier than trying to rescue an entire batch at the end.
How to Split English Muffins
For the best texture, don’t necessarily slice them perfectly smooth with a knife.
English muffins are famous for their little nooks and crannies.
Use a fork to gently pierce around the edge and pull the muffin apart.
Then toast the two halves.
The uneven surface catches melted butter, cream cheese, jam, or other toppings beautifully.
My Favorite Ways to Serve Them
These homemade English muffins are flexible enough for both sweet and savory breakfasts.
Butter
A warm toasted muffin with butter is probably the simplest option. The butter melts into all those little pockets inside.
Orange Butter
For something a little different, serve them with orange butter. The citrus flavor pairs particularly well with the lightly toasted crust.
Cream Cheese and Jam
Spread cream cheese over a toasted half and add your favorite jam.
Strawberry, raspberry, blueberry, or apricot all work nicely.
Breakfast Sandwiches
Use the muffins instead of regular bread for breakfast sandwiches.
Try:
- Fried or scrambled eggs
- Cheese
- Cooked breakfast meat
- Sliced tomato
- Avocado
- A little hot sauce
The sturdy texture makes them particularly good for sandwiches.
What If My Dough Isn’t Rising?
Don’t panic immediately.
Yeast dough can take longer when the room is cold.
Give it more time and place the bowl somewhere comfortably warm.
However, if you used water or milk that was extremely hot, the yeast may have been damaged.
For future batches, aim for warm rather than hot liquid.
Also check the expiration date of your yeast. Old yeast is one of those small things that can ruin an otherwise perfectly prepared dough.
Can You Make the Dough Ahead?
Yes, you can prepare parts of the process ahead to make breakfast easier.
The easiest approach is to make the dough, allow it to rise, shape the muffins, and then plan the cooking around when you want to serve them.
For longer storage, cooked muffins can be kept in a resealable plastic bag once completely cooled.
Don’t seal them while they’re still hot. Trapped steam can make the surface damp and affect the texture.
How to Store Leftover English Muffins
Allow the muffins to cool completely before storing them.
Place them in a resealable plastic bag and keep them at room temperature for short-term storage.
For longer storage, freezing is a practical option.
When you’re ready to eat one, let it thaw and then toast it. Toasting helps bring back the crisp exterior and warm interior that makes freshly cooked English muffins so good.
English Muffin Troubleshooting
My muffins are dark outside but raw inside.
Your griddle is probably too hot.
Lower the heat and cook them more slowly.
My muffins are too dense.
The dough may have needed more rising time, or too much flour may have been added.
Next time, pay attention to the dough’s appearance rather than relying only on the timer.
My dough is very sticky.
Add flour gradually rather than dumping in a large amount.
The dough should be soft but workable.
My yeast isn’t foaming.
Check that the water isn’t too hot or too cold and make sure your yeast is still active.
My muffins stick to the pan.
Make sure the griddle is lightly greased and that the muffins have enough cornmeal on their surfaces.
Avoid moving them around constantly while they cook.
A Few Practical Tips for Better Results
Use medium heat. This is probably the single most useful cooking tip.
Don’t rush the rising time. The dough needs time to develop its light texture.
Measure flour carefully. Too much flour can make the muffins heavy.
Cook one test muffin first. It gives you a chance to adjust the griddle temperature.
Don’t skip the cornmeal. It contributes both texture and the classic English muffin feel.
Let them cool before storing. This helps prevent condensation inside the storage bag.
Toast them after splitting. That’s when the nooks and crannies really shine.
Recipe at a Glance
Prep Time: 25 minutes
Cook Time: 20 minutes
Additional Time: 1 hour 30 minutes
Total Time: About 2 hours 15 minutes
Yield: About 18 English muffins
Ingredients
- 1 cup milk
- 2 tablespoons white sugar
- 1 cup warm water
- 1 packet active dry yeast
- 6 cups all-purpose flour
- ¼ cup melted shortening
- 1 teaspoon salt
- ¼ cup cornmeal, plus extra as needed
Basic Method
- Warm the milk and dissolve the sugar.
- Let the milk cool to lukewarm.
- Mix warm water with yeast and let it stand for about 10 minutes.
- Combine the milk, yeast, flour, and shortening.
- Add salt and remaining flour to form a soft dough.
- Knead and let the dough rise until doubled.
- Roll to about ½-inch thickness.
- Cut into rounds.
- Dust with cornmeal and let them rise again for 30 minutes.
- Cook on a lightly greased griddle over medium heat.
- Cook about 10 minutes per side.
- Split, toast, and serve with your favorite toppings.
Final Thoughts
Homemade English muffins take a little more time than opening a package from the grocery store, but most of that time is simply the dough rising while you do something else.
The actual hands-on work is straightforward.
What I like most about this recipe is that it doesn’t require special equipment or unusual ingredients. A mixing bowl, rolling pin, cutter, and griddle are enough to get started.
Once you’ve made a batch, try one while it’s still warm and toasted with butter. Then try cream cheese and jam. You’ll probably find yourself making them again—not because the recipe is complicated, but because a fresh homemade English muffin is simply hard to beat.