
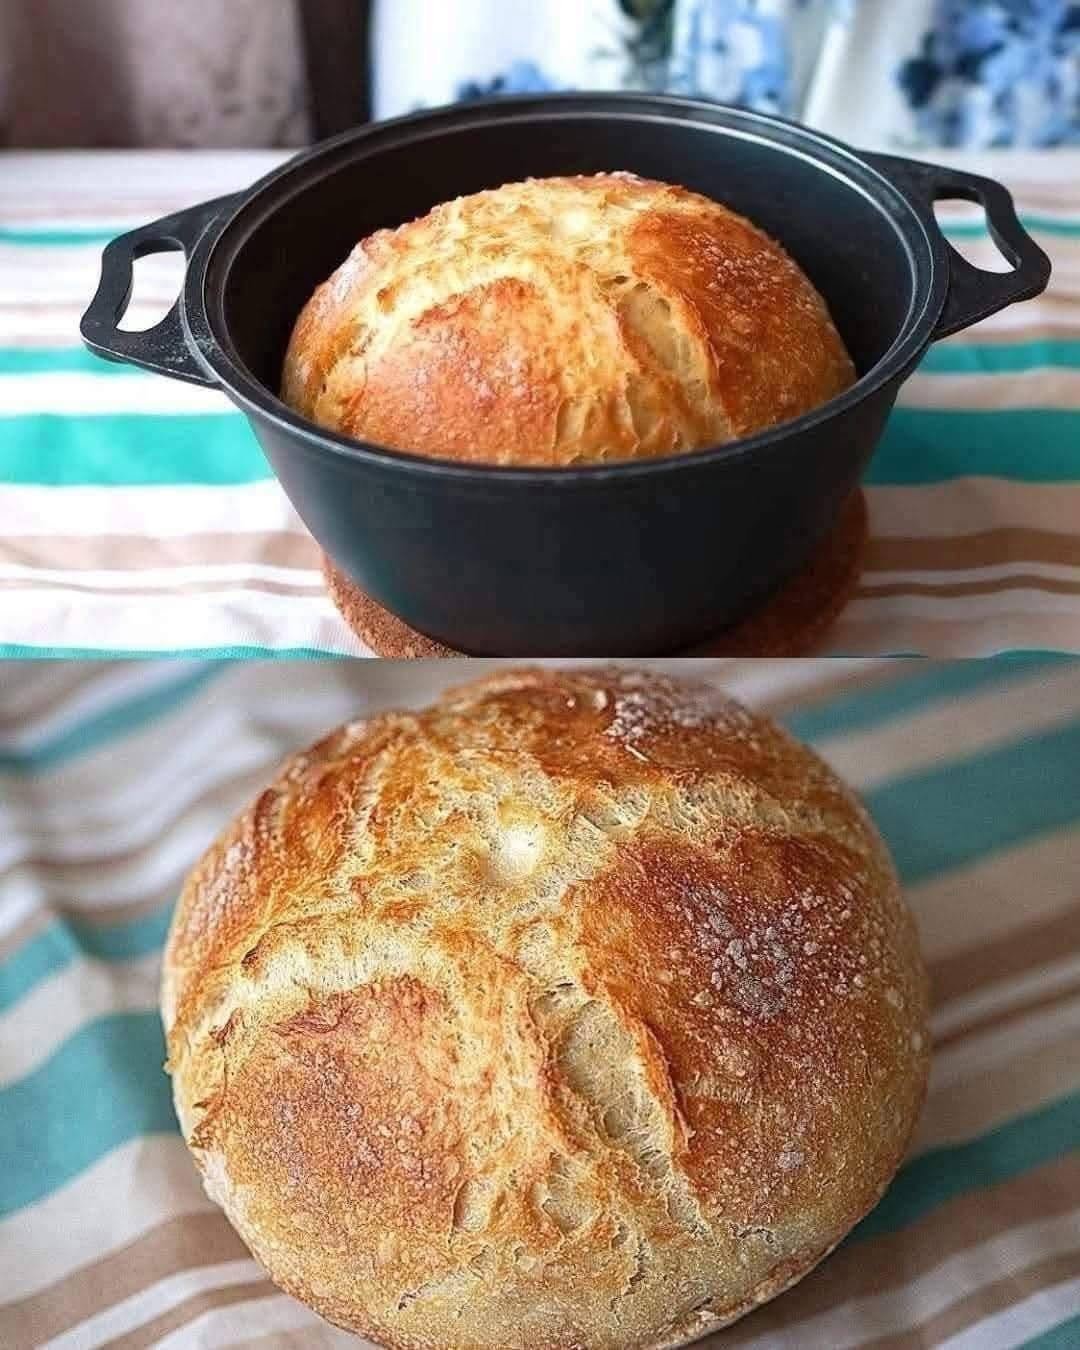
There is something special about making a fresh loaf of sourdough bread at home. The golden, crispy crust, soft chewy center, and slightly tangy flavor make every slice worth the effort. Unlike traditional bread recipes that rely on commercial yeast, sourdough uses a naturally fermented starter made from flour and water.
This homemade sourdough bread recipe uses just four basic ingredients: active sourdough starter, water, bread flour, and salt. You don’t need a complicated list of ingredients or professional baking equipment. A mixing bowl, kitchen scale, and Dutch oven are enough to get started.
One thing to remember is that sourdough baking takes time. The dough needs several hours to ferment and develop its structure. However, most of that time is hands-off, giving you the freedom to take care of other things while the dough does its work.
If you’re new to sourdough baking, don’t worry. I’ll walk you through each stage, including mixing, stretching and folding, shaping, proofing, and baking. You’ll also find practical tips to help you avoid common problems and get a better loaf.
Why You’ll Love This Sourdough Bread Recipe
- Only four ingredients: Everything you need is simple and easy to find.
- No commercial yeast: The active sourdough starter provides natural fermentation.
- Crispy golden crust: Baking in a covered Dutch oven helps create a beautiful crust.
- Soft and chewy inside: Proper fermentation helps develop an airy crumb.
- Great for everyday meals: Enjoy it with breakfast, soups, sandwiches, or your favorite spreads.
- Beginner-friendly: The instructions explain each stage without making the process complicated.
Ingredients You’ll Need
You only need four ingredients to prepare this homemade artisan sourdough loaf.
| Ingredient | Amount |
|---|---|
| Active sourdough starter | 100 g (about ½ cup, depending on consistency) |
| Lukewarm water | 375 ml (1½ cups + 1 tbsp) |
| Bread flour | 500 g (about 4 cups, depending on how it’s measured) |
| Fine sea salt | 10 g (about 1¾ teaspoons) |
A Few Notes About the Ingredients
Active sourdough starter: Use a recently fed starter that is bubbly, has expanded, and is near its peak. A starter that is active and predictable will help the dough rise properly.
Water: Lukewarm water is easier to work with than cold water. Avoid very hot water because excessive heat can damage the natural yeast and bacteria.
Bread flour: Unbleached bread flour is a good choice because its protein content helps develop the gluten structure needed for a strong, well-risen loaf.
Sea salt: Salt improves flavor and helps strengthen the dough. Measure it carefully rather than estimating.
Equipment Needed
You don’t need expensive bakery equipment. These basic kitchen tools will make the process easier:
- Large mixing bowl
- Digital kitchen scale
- Dough scraper
- Clean kitchen towel or plastic cover
- Bench scraper
- Parchment paper
- Banneton basket or a bowl lined with a floured kitchen towel
- Dutch oven with lid
- Sharp bread lame or razor blade
How to Make Homemade Sourdough Bread
Follow these steps carefully. The timing can change depending on your kitchen temperature and how active your starter is, so watch the dough rather than relying only on the clock.
Step 1: Mix the Starter and Water
Add 100 grams of active sourdough starter to a large mixing bowl. Pour in 375 ml of lukewarm water and stir until the starter is mostly dissolved.
The mixture may look cloudy, which is completely normal. Breaking up the starter first helps distribute it evenly throughout the dough.
Step 2: Add the Bread Flour and Salt
Add 500 grams of bread flour and 10 grams of fine sea salt to the bowl.
Mix everything using a sturdy spoon or your hands until no large dry patches of flour remain. The dough will look rough and sticky at this stage.
Don’t worry about making it smooth right away. Sourdough dough naturally starts out uneven before the gluten develops.
Step 3: Let the Dough Rest
Cover the bowl and leave the dough to rest for approximately 30 to 45 minutes.
This resting period allows the flour to absorb the water and makes the dough easier to handle during the next stage.
Step 4: Perform Stretch and Folds
Wet your hands slightly to prevent sticking.
Grab one side of the dough, gently stretch it upward, and fold it over the center. Turn the bowl and repeat this movement on all four sides.
This completes one round of stretch and folds.
Cover the dough and rest it for approximately 30 minutes. Repeat the process 3 to 4 times.
As you continue folding, the dough should become smoother, stronger, and more elastic.
Step 5: Bulk Fermentation
After the final stretch and fold, cover the bowl and let the dough ferment at room temperature.
This stage can take approximately 4 to 6 hours, depending on your starter’s activity and kitchen temperature. In cooler kitchens, it may take longer.
Look for these signs:
- The dough has increased in volume by approximately 50% to 75%.
- Small bubbles appear along the sides of the bowl.
- The surface looks slightly domed.
- The dough feels lighter and more elastic.
- It jiggles gently when you move the bowl.
Avoid waiting for the dough to double automatically. Over-fermentation can make shaping difficult and cause the loaf to spread during baking.
Step 6: Shape the Dough
Lightly flour your work surface and gently transfer the dough onto it.
Fold the edges toward the center to create a rough round shape. Turn the dough over so the smooth side faces upward.
Using your hands or a bench scraper, gently pull the dough toward you to create surface tension.
Let it rest uncovered for about 15 to 20 minutes. This short resting period helps the dough relax before its final shaping.
Step 7: Final Shaping
Turn the dough over and gently stretch it into a rough rectangle.
Fold the top toward the center, then fold the sides inward. Roll the dough into a tight loaf, keeping the outer surface smooth.
Place it seam-side up in a well-floured banneton basket or a bowl lined with a floured kitchen towel.
Step 8: Cold Proof in the Refrigerator
Cover the dough and place it in the refrigerator for approximately 8 to 16 hours.
Cold fermentation helps develop flavor and makes the dough easier to score before baking.
If you’re short on time, you can proof at room temperature until the dough looks slightly puffy, but the cold-proofing method offers more flexibility.
Step 9: Preheat the Dutch Oven
Place your Dutch oven and its lid inside the oven.
Preheat to 450°F (232°C) for approximately 30 to 45 minutes.
A properly preheated Dutch oven helps the bread rise during the initial baking stage and develops a crisp crust.
Be careful when handling the hot pot and lid.
Step 10: Score and Bake
Remove the dough from the refrigerator and carefully turn it onto a piece of parchment paper.
Using a sharp bread lame or razor blade, make one confident slash across the top, approximately ¼ to ½ inch deep.
Carefully lower the dough into the hot Dutch oven using the parchment paper.
Cover with the lid and bake for 20 minutes at 450°F (232°C).
Remove the lid and continue baking for another 20 to 25 minutes, or until the crust becomes deep golden brown.
Step 11: Cool Before Slicing
Remove the bread from the Dutch oven and transfer it to a wire cooling rack.
Allow it to cool for at least 1 to 2 hours before slicing.
This is an important step. Cutting sourdough while it is still hot can leave the inside gummy because the crumb is still setting.
Once cooled, slice and enjoy your homemade sourdough bread!
Tips for Getting the Best Sourdough Bread
A few small details can make a noticeable difference in your final loaf.
Use an active starter: Your starter should be bubbly and consistently rise after feeding. A weak starter may produce a dense loaf.
Measure ingredients by weight: A digital kitchen scale is more reliable than measuring flour with cups because flour volume changes depending on how tightly it is packed.
Watch the dough, not just the clock: Temperature affects fermentation. A warm kitchen usually speeds up the process, while a cool kitchen slows it down.
Don’t add too much extra flour: Sticky dough is normal for sourdough. Adding too much flour can make the bread heavy and dry.
Build enough dough strength: Stretch and folds help develop gluten, which supports the structure of the loaf.
Let the bread cool completely: Waiting before slicing gives the inside time to finish setting.
Common Sourdough Bread Problems and How to Fix Them
Why Is My Sourdough Bread Dense?
A dense loaf often happens when the starter is not active enough or the dough has not fermented sufficiently. Make sure your starter rises reliably after feeding and allow the dough enough time to develop.
Why Does My Dough Spread Instead of Holding Its Shape?
This can happen when the dough is over-fermented, too wet, or lacks sufficient gluten development. Try improving your stretch-and-fold technique and monitor bulk fermentation more carefully.
Why Is My Sourdough Crust Too Hard?
A very dark or thick crust may result from excessive baking time or oven temperature. Check your oven temperature and adjust the uncovered baking period if necessary.
Why Is the Inside of My Bread Gummy?
The most common reason is slicing the bread before it has cooled completely. Allow at least 1 to 2 hours of cooling before cutting.
Why Didn’t My Sourdough Bread Rise?
An inactive starter, cold fermentation conditions, or insufficient proofing can prevent proper rising. Check your starter’s activity before mixing the dough.
How to Store Homemade Sourdough Bread
Homemade sourdough bread tastes best during the first couple of days after baking.
- Room temperature: Store the cooled loaf cut-side down on a cutting board or inside a bread bag for about 2 to 3 days.
- Refrigerator: Refrigeration can dry out bread, so it is generally not the best storage option.
- Freezer: Slice the bread and place the slices in a freezer-safe bag. Freeze for up to 3 months for the best quality.
To enjoy frozen slices, place them directly in a toaster or allow them to thaw at room temperature.
What to Serve with Sourdough Bread
There are plenty of ways to enjoy a fresh homemade sourdough loaf.
- Spread softened butter over a warm slice.
- Serve with scrambled eggs for breakfast.
- Make a delicious grilled cheese sandwich.
- Pair it with tomato soup or creamy vegetable soup.
- Add avocado, olive oil, and a little sea salt.
- Use slightly stale slices to prepare homemade croutons.
Frequently Asked Questions
1. Is sourdough bread difficult for beginners?
Not at all. The process requires patience, but the individual steps are simple. Start by following a reliable recipe and learn how your dough behaves during fermentation.
2. Can I make sourdough bread without a Dutch oven?
Yes. A baking stone or heavy baking tray can also work. You can introduce steam into the oven using a suitable oven-safe method to help develop the crust.
3. How long does homemade sourdough bread take?
The total time depends on starter activity, room temperature, and proofing conditions. With the resting, fermentation, overnight refrigeration, baking, and cooling stages, plan for approximately 18 to 24 hours or longer.
4. Can I use all-purpose flour instead of bread flour?
Yes, but the dough may have a different texture because all-purpose flour usually contains less protein than bread flour. You may also need to adjust the water slightly.
5. How do I know when my sourdough starter is ready?
A healthy starter should show plenty of bubbles and rise noticeably after feeding. Many starters double in size within approximately 4 to 8 hours at a suitable temperature, although timing varies.
6. Why does sourdough bread taste sour?
The tangy flavor comes from natural fermentation. The acids produced by wild yeast and beneficial bacteria give sourdough its characteristic taste.
7. Can I freeze homemade sourdough bread?
Absolutely. Let the loaf cool completely, slice it, and store the slices in an airtight freezer-safe bag for up to 3 months for the best quality.
8. Is sourdough bread gluten-free?
No. Traditional sourdough made with wheat or bread flour contains gluten and is not suitable for people who need to avoid gluten.
Final Thoughts
Making homemade sourdough bread is a rewarding kitchen project that becomes easier with practice. The combination of a simple ingredient list, natural fermentation, and a little patience creates a loaf with a crispy crust and soft, chewy center.
Don’t be discouraged if your first loaf isn’t perfect. Fermentation, shaping, and oven conditions take time to understand. Keep practicing, pay attention to how your dough changes, and enjoy the process of making fresh bread at home.
Once you get comfortable with the basics, you can experiment with different flour combinations, fermentation times, and shaping techniques to create your own favorite sourdough loaf.
Recipe Card
Easy Homemade Sourdough Bread
- Prep Time: 30 minutes
- Bulk Fermentation: 4–6 hours (approximately)
- Cold Proof: 8–16 hours
- Cook Time: 40–45 minutes
- Cooling Time: 1–2 hours
- Total Time: Approximately 18–24 hours or longer
- Yield: 1 loaf
- Category: Bread
- Cuisine: American
- Method: Baking
Ingredients
- 100 g active sourdough starter
- 375 ml lukewarm water
- 500 g bread flour
- 10 g fine sea salt
Instructions
- Mix the active starter with lukewarm water.
- Add bread flour and salt, then mix until no dry flour remains.
- Cover and rest for 30–45 minutes.
- Perform 3–4 rounds of stretch and folds, resting 30 minutes between rounds.
- Allow the dough to bulk ferment for approximately 4–6 hours, or until it shows sufficient growth and bubbles.
- Shape the dough into a round loaf and rest for 15–20 minutes.
- Complete the final shaping and place it seam-side up in a floured proofing basket.
- Cover and refrigerate for 8–16 hours.
- Preheat a Dutch oven to 450°F (232°C).
- Score the dough and bake covered for 20 minutes.
- Remove the lid and bake for another 20–25 minutes until golden brown.
- Cool on a wire rack for 1–2 hours before slicing.
Nutrition Information (Estimated Per Serving)
Nutrition values depend on flour brands, loaf size, and serving weight. Calculate them using your actual ingredients before publishing a verified nutrition label.
