
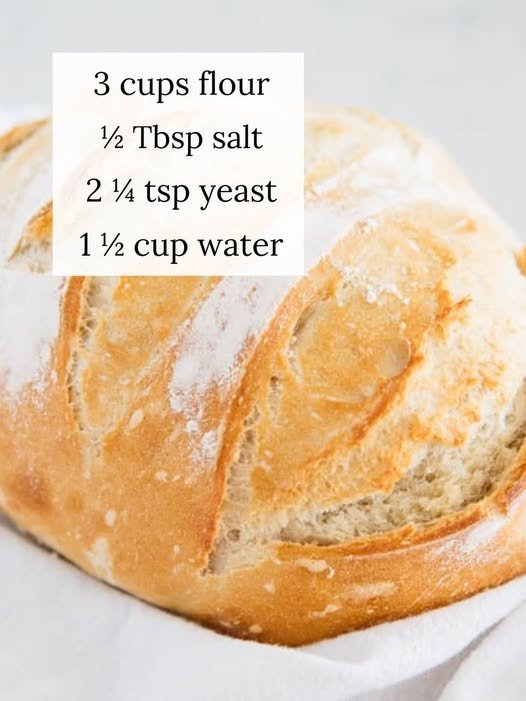
There is something special about homemade bread, especially when it comes out of the oven with a beautifully golden crust and a soft, airy center. This Easy 3 Ingredient Artisan Bread is perfect when you want fresh bakery-style bread without spending hours in the kitchen.
The best part? You don’t need a stand mixer, special baking skills, or even a complicated kneading process. Simply combine flour, salt, yeast, and warm water, let the dough rise, shape it gently, and bake until golden.
This beginner-friendly no-knead artisan bread is wonderful for serving alongside soups, pasta, salads, or simply enjoying with butter. Whether you’re making homemade bread for the first time or looking for an easy everyday recipe, this one is worth keeping in your kitchen.
Why You’ll Love This Easy Artisan Bread
- Simple ingredients: Made with basic pantry staples that are easy to find.
- No kneading required: The dough develops its texture naturally during resting.
- Beginner-friendly: No special baking experience is needed.
- Beautiful crust: Baking with steam helps create a deliciously crisp exterior.
- Versatile: Enjoy it with breakfast, lunch, dinner, or your favorite spreads.
Ingredients You’ll Need
- 3 cups (395g) all-purpose flour: Regular all-purpose flour works perfectly, but bread flour can also be used for a chewier texture.
- ½ tablespoon kosher salt: Adds flavor and balances the taste of the bread.
- 2¼ teaspoons instant or active dry yeast: Helps the dough rise and creates a light, airy interior.
- 1½ cups warm water (105°F): Brings the ingredients together and activates the yeast.
Note: Although this recipe is commonly called 3-ingredient bread, it uses three main pantry ingredients plus water.
How to Make 3 Ingredient Artisan Bread
Step 1: Prepare the Dough
Add the flour, salt, and yeast to a large mixing bowl. Pour in the warm water and stir everything together using a wooden spoon, spatula, or your hands.
Continue mixing until no dry flour remains. The dough should look rough, slightly wet, and sticky. Don’t worry about making it smooth because this is a no-knead bread recipe.
Step 2: Let the Dough Rise
Cover the bowl with plastic wrap or a clean kitchen towel. Leave it at room temperature for approximately 2–10 hours, or overnight if preferred.
During this time, the yeast will work through the dough, creating bubbles and developing flavor. The dough should become noticeably larger and airy.
Step 3: Shape the Bread
Lightly flour your work surface and wet your hands to prevent sticking. Gently transfer the dough onto the surface.
Pull the edges of the dough toward the center and fold them together to create a round loaf. Avoid kneading, pressing, or punching down the dough because you want to preserve its air bubbles.
Place the shaped dough on parchment paper, dust the top lightly with flour, and make a few shallow cuts across the surface using a sharp bread knife.
Allow it to rest for another 20–30 minutes.
Step 4: Prepare the Oven
Preheat your oven to 450°F (232°C).
Place a baking stone, pizza stone, Dutch oven, or oven-safe skillet inside while the oven heats. A properly heated baking surface helps the bread develop a crisp bottom crust.
Step 5: Bake Until Golden
Carefully transfer the dough with its parchment paper onto the hot baking surface.
For a crispier crust, create steam inside the oven by placing a small oven-safe pan with hot water on the lower rack. Alternatively, use a few ice cubes in a suitable oven-safe pan.
Bake for approximately 25–30 minutes, or until the loaf develops a deep golden-brown crust.
Step 6: Cool and Serve
Remove the bread from the oven and transfer it to a wire cooling rack.
Allow it to cool for at least 30 minutes before slicing. This resting time helps the inside finish setting and prevents the bread from becoming gummy.
Serve warm with butter, olive oil, soup, or your favorite sandwich fillings.
Helpful Tips for Perfect Artisan Bread
- Use warm water: Water that is too hot can damage the yeast. Aim for approximately 105°F.
- Don’t overwork the dough: Gentle folding is enough to shape this bread.
- Allow enough rising time: A longer fermentation can improve the flavor and texture.
- Handle sticky dough carefully: Wet hands make shaping much easier.
- Create steam while baking: Steam helps produce a crisp, bakery-style crust.
- Let the bread cool: Cutting too early can make the inside appear gummy.
Variations You Can Try
- Garlic Herb Bread: Add garlic powder and dried rosemary for a savory flavor.
- Whole Wheat Artisan Bread: Replace part of the all-purpose flour with whole wheat flour.
- Cheese Bread: Fold shredded cheddar or Parmesan into the dough.
- Seeded Bread: Sprinkle sesame, sunflower, or pumpkin seeds over the top before baking.
How to Store Homemade Artisan Bread
At Room Temperature: Allow the bread to cool completely and store it in a brown paper bag for up to 3 days. This helps maintain its crust.
In the Refrigerator: Refrigeration is generally not recommended because it can make homemade bread stale faster.
In the Freezer: Place completely cooled bread in a freezer-safe bag and freeze for up to 3 months.
To enjoy frozen bread, let it thaw at room temperature before serving. You can also warm slices in the oven for a freshly baked taste.
Frequently Asked Questions
1. Can I make artisan bread without kneading?
Yes! This recipe is specifically designed to be made without kneading. Mixing and resting allow the dough to develop its structure naturally.
2. Why is my artisan bread dough so sticky?
Sticky dough is completely normal for this recipe. If it is difficult to handle, lightly flour your hands and work surface before shaping.
3. Can I prepare the dough overnight?
Absolutely! You can cover the bowl and leave the dough at room temperature overnight. Longer fermentation can develop a deeper flavor.
4. Can I refrigerate the dough for later?
Yes. After mixing, cover the dough and refrigerate it for up to one week. When ready to bake, shape it and allow it to rest before placing it in the oven.
5. How do I know when artisan bread is fully baked?
The crust should be golden brown and firm. The loaf should also sound hollow when tapped on the bottom.
Final Thoughts
Making homemade bread doesn’t have to be complicated. This Easy 3 Ingredient Artisan Bread proves that a few simple pantry ingredients and a little patience can produce a beautiful loaf with a crunchy crust and soft, airy center.
Once you try this no-knead method, you’ll have an easy homemade bread recipe to enjoy whenever the craving strikes. Serve it fresh from the oven with butter, your favorite soup, or a delicious homemade spread.
