
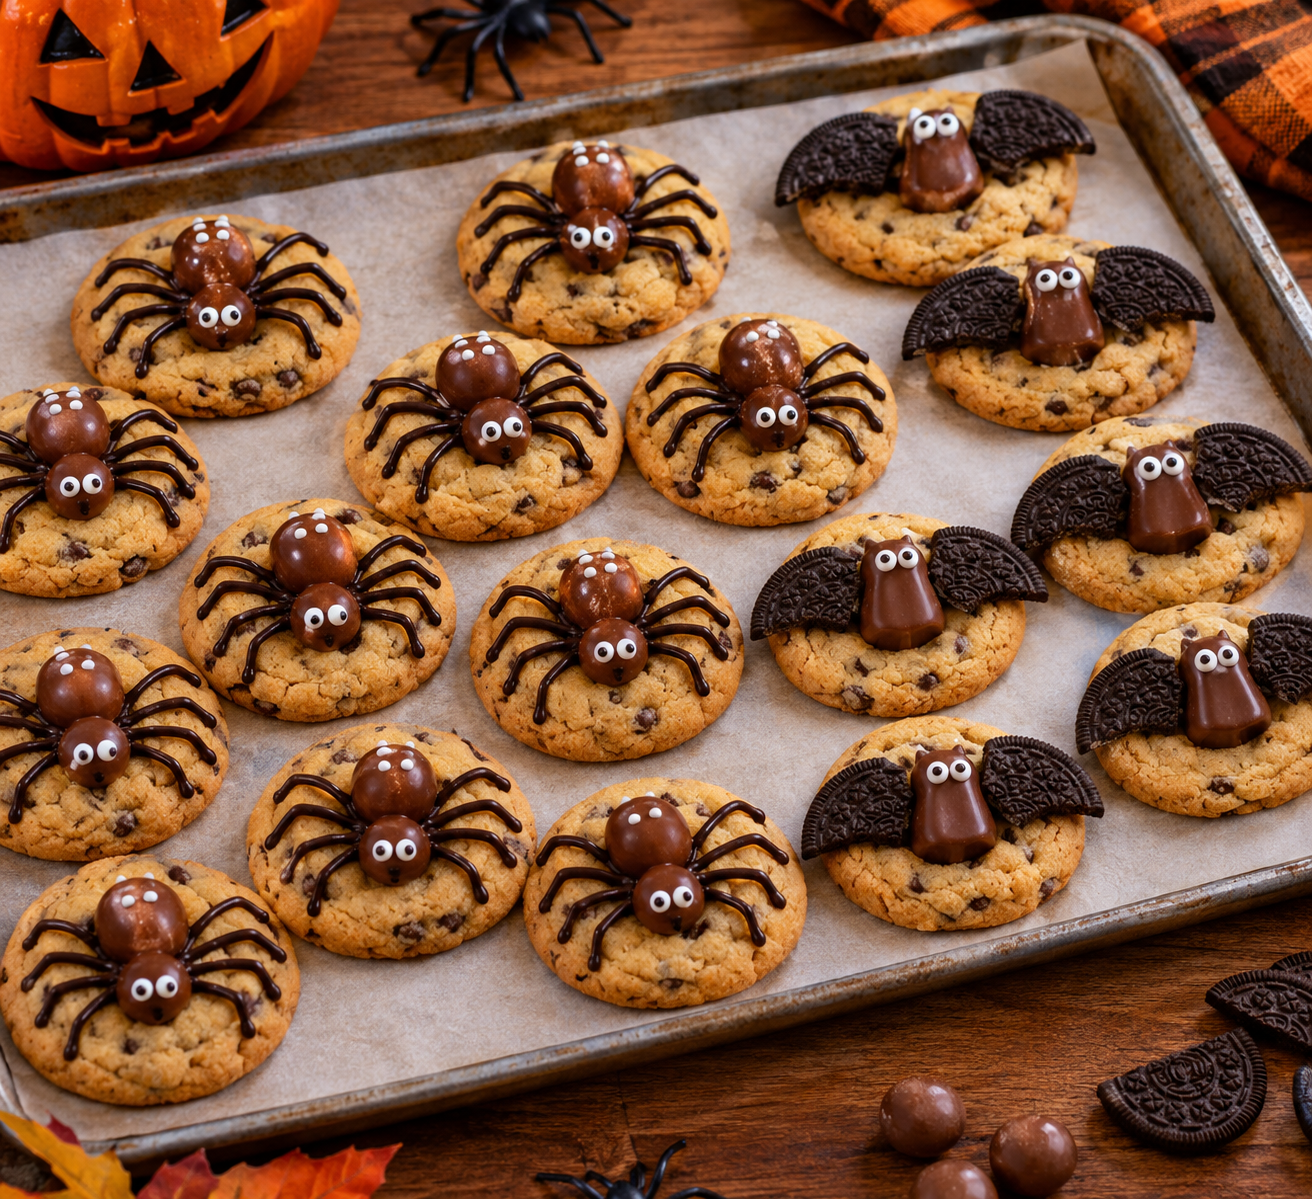
Halloween cookies are a fun way to make homemade treats look spooky and delicious. These Halloween cookies start with a soft chocolate chip cookie base and are decorated as little spiders and bats using chocolate, icing, and chocolate candies. They are perfect for Halloween parties, family baking days, or a fun activity with children.
The best part is that you do not need professional decorating skills. With a few simple ingredients and a little patience, you can turn ordinary cookies into creative Halloween treats.
Why You’ll Love These Halloween Cookies
- Easy to make: The cookie dough uses common baking ingredients.
- Two fun designs: Make spider cookies and bat cookies from the same batch.
- Great for parties: Their playful appearance makes them ideal for Halloween celebrations.
- Family-friendly activity: Children can help decorate the cooled cookies with adult supervision.
- Chocolate flavor: Chocolate chips and candy decorations make every cookie extra special.
Ingredients
For the Cookies
- 125 g unsalted butter, softened
- 100 g light brown sugar
- 75 g granulated sugar
- 1 teaspoon vanilla extract
- 1 large egg
- 225 g all-purpose flour
- 1 teaspoon baking powder
- 100 g chocolate chips
For Spider Cookies
- 20 Maltesers or similar round chocolate candies
- 50 g melted chocolate
- 30–40 g royal icing
- Extra royal icing for decoration, if desired
For Bat Cookies
- 10 cream-filled chocolate sandwich cookies
- 10 caramel-filled chocolates
- Royal icing, as needed
- A little melted chocolate for decorating the eyes
Note: The quantities for the decorations are approximate. You may need slightly more or less depending on the size of your cookies and the candies available.
How to Make Halloween Cookies
Step 1: Prepare the Oven
Preheat your oven to 180°C (160°C fan). Line two baking sheets with baking parchment. Preparing the trays first makes it easier to transfer the cookie dough without delay.
Step 2: Make the Cookie Dough
Place the softened butter, brown sugar, and granulated sugar in a mixing bowl. Beat with an electric whisk until the mixture looks light and fluffy.
Add the vanilla extract and egg, then beat again until combined. Add the flour and baking powder, mixing with a wooden spoon until a stiff dough forms. Fold in the chocolate chips evenly.
Step 3: Shape the Cookies
Divide the dough into 20 equal portions and roll each portion into a ball. Arrange the balls on the prepared baking sheets, leaving enough space between them because they will spread during baking.
Gently flatten each ball using your palm or the bottom of a glass. Avoid flattening them too much, as a little thickness helps keep the cookies soft in the middle.
Step 4: Bake the Cookies
Bake for 10–12 minutes, or until the edges turn lightly golden. The centres may still look slightly soft when you remove the trays from the oven.
Leave the cookies on the baking sheets for about 10 minutes before transferring them to a wire rack. Allow them to cool completely before decorating. Warm cookies can cause the chocolate and icing to melt.
Step 5: Decorate the Spider Cookies
Arrange 10 cooled cookies on a clean work surface. Place the melted chocolate and royal icing in separate piping bags and carefully snip off the tips.
Pipe a small dot of royal icing onto the back of two Maltesers. Place one candy on each cookie to form the spider’s head and the other to form its body.
Repeat with the remaining cookies. Use the melted chocolate to pipe eight legs around each spider’s body. Add two small dots of royal icing to each head for the eyes, then add tiny chocolate dots for the pupils.
For extra detail, decorate the spider bodies with small lines or dots of royal icing.
Step 6: Decorate the Bat Cookies
Arrange the remaining 10 cooled cookies on your work surface. Carefully separate the cream-filled chocolate sandwich cookies and scrape away the cream filling.
Using a small serrated knife, cut the chocolate cookie pieces into semicircles to create bat wings. Work slowly to reduce breakage.
Pipe a little royal icing onto the centre of each cookie and attach a caramel-filled chocolate to make the bat’s body. Add one semicircle to each side to form the wings.
Finally, pipe small eyes onto the chocolate bodies using royal icing and melted chocolate. Allow the decorations to set before serving.
Tips for Perfect Halloween Cookies
- Use softened butter: Butter should be soft enough to beat easily but not melted.
- Measure the flour carefully: Too much flour can make the cookies dry and crumbly.
- Leave enough space: Cookies spread in the oven, so avoid placing them too close together.
- Cool completely: Decorating warm cookies can make the icing run and the chocolate slide off.
- Handle cookie wings gently: Chocolate sandwich cookies can break easily when cut. Keep a few extra pieces available.
- Prepare piping bags in advance: Having the chocolate and icing ready makes decorating quicker and easier.
Common Mistakes to Avoid
Decorating before cooling: Always let the cookies cool completely before adding the candies and icing.
Overbaking the cookies: Baking for too long can produce hard cookies. Remove them when the edges are golden and the centres are still slightly soft.
Using runny icing: Thick royal icing works better for attaching the decorations. If it is too thin, the candies may slide off.
Cutting the wings too quickly: Use a small serrated knife and gentle movements to reduce cracking.
How to Store Halloween Cookies
Store the completely cooled and decorated cookies in an airtight container at room temperature for approximately 3–4 days, provided the ingredients and local conditions allow safe storage. Keep them in a cool, dry place away from direct sunlight.
For the best appearance, arrange the cookies in a single layer or separate layers with parchment paper to protect the decorations. If your kitchen is warm, the chocolate decorations may soften, so a cool storage area is preferable.
Frequently Asked Questions
Can I make Halloween cookies ahead of time?
Yes. You can bake the cookies a day or two before your Halloween event and decorate them once they have cooled. Store them in an airtight container.
Why did my cookies spread too much?
Butter that is too warm, excessive sugar, or insufficient flour can cause cookies to spread. Make sure your butter is softened rather than melted and measure the ingredients accurately.
Can I use regular chocolate instead of Maltesers?
Yes. You can use other small, round chocolate candies to create the spider’s head and body. Choose pieces that are easy to attach with icing.
How do I keep the bat wings from breaking?
Cut the chocolate sandwich cookies slowly with a small serrated knife. Because some pieces may break, prepare a few extra wings before decorating.
Can children help make these cookies?
Yes. Children can help roll the dough and decorate the cooled cookies. An adult should supervise oven use and assist with cutting the chocolate cookie pieces.
Final Thoughts
These Halloween spider and bat cookies turn a simple chocolate chip cookie recipe into a fun seasonal treat. The soft cookie base, chocolate decorations, and playful designs make them a great choice for Halloween parties and family baking.
Prepare the cookies ahead of time, let them cool completely, and enjoy decorating each one with its own spooky personality.
