
There are days when you want fresh homemade bread but do not have the time to wait until tomorrow. Maybe you are preparing soup for dinner, making sandwiches for the family, or simply want a warm loaf to serve with butter. Buying bread is easy, but baking your own gives you that fresh-from-the-oven smell and a crust you can enjoy while the inside is still soft.
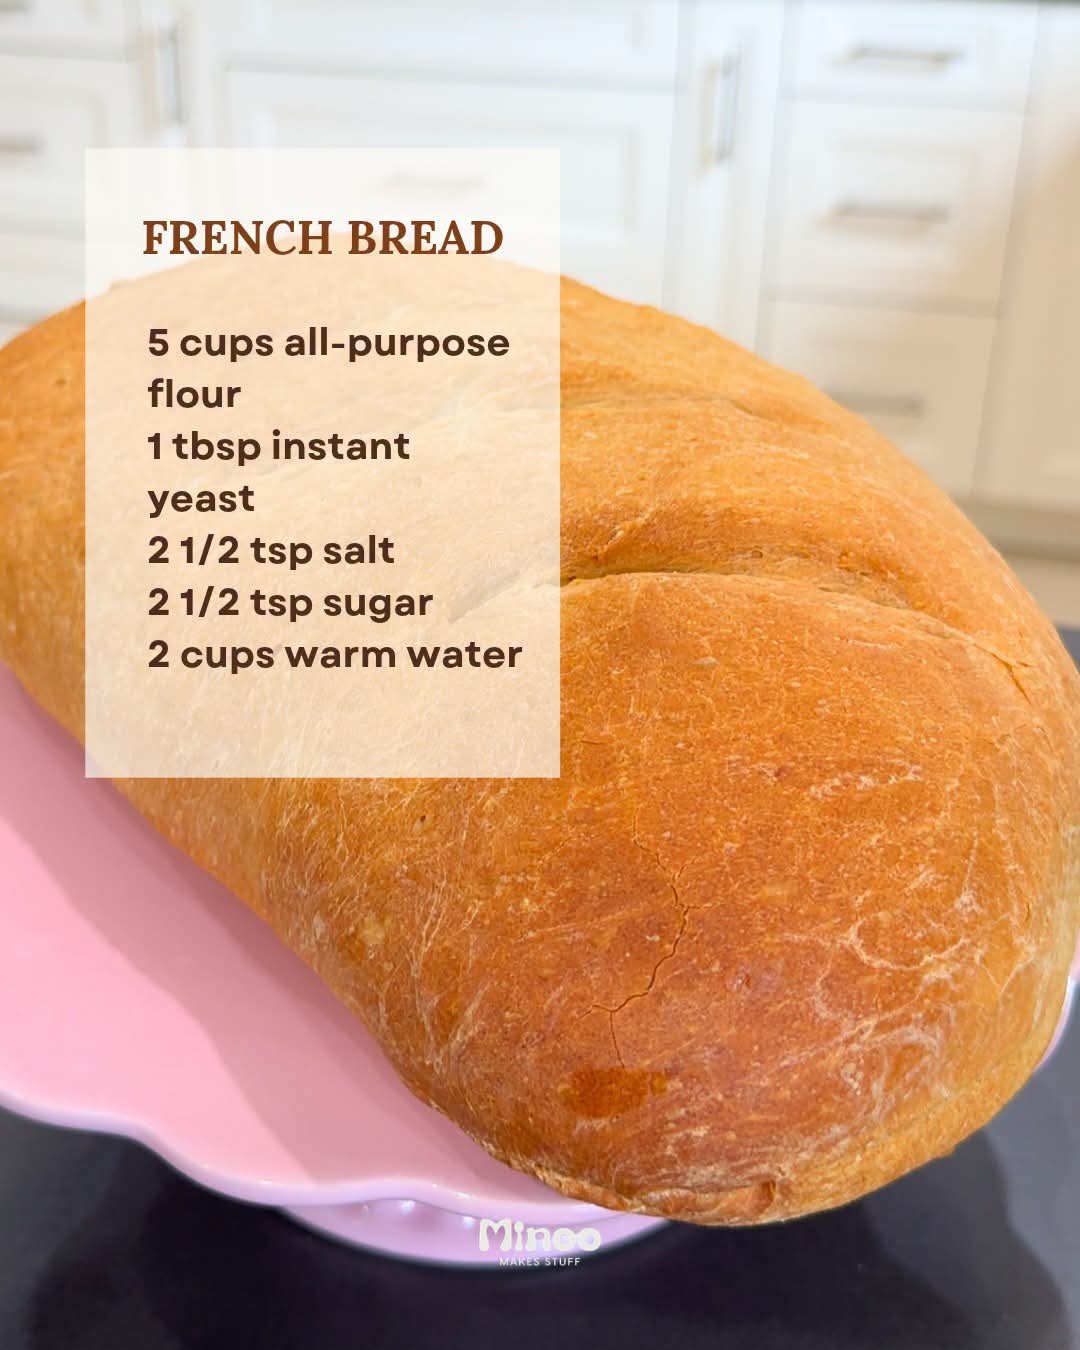
This quick rise French bread recipe is a practical option when you want a homemade loaf without spending the entire day in the kitchen. It uses five basic ingredients, including all-purpose flour, instant yeast, salt, sugar, and warm water. You do not need a Dutch oven, a stand mixer, or any complicated baking equipment.
The dough is kneaded until smooth, allowed to rise, shaped into a long loaf, and baked on an ordinary baking sheet. The total time is approximately three hours, including rising and baking, although the actual preparation requires much less hands-on work.
One important thing to understand before starting: quick-rise bread still needs time to rise properly. The goal is to make the process manageable, not to rush the yeast so much that the finished bread becomes dense.
Why This Quick Rise French Bread Recipe Works
Traditional French bread recipes can involve long fermentation periods and specialized techniques. This version takes a simpler approach that works well for everyday home baking.
Instant yeast helps the dough rise without requiring a separate activation step. Warm water encourages yeast activity, while kneading develops the structure that allows the dough to hold its shape.
The first rise gives the dough time to expand. After shaping, a second rise helps create a lighter loaf with a more open interior.
Baking at 375°F (190°C) allows the bread to cook through while its exterior develops a golden crust.
You should not expect exactly the same texture as a traditional French baguette baked in a professional steam-injected oven. This recipe makes a larger, home-style French bread loaf that is excellent for sandwiches, dipping, and everyday meals.
Recipe Overview
- Prep time: 20 minutes
- First rise: 30–60 minutes
- Second rise: 30–60 minutes
- Bake time: 40–45 minutes
- Total time: Approximately 3 hours and 5 minutes, depending on rising time
- Yield: 3 servings as listed by the source recipe; actual portions depend on loaf size and how you slice it
- Oven temperature: 375°F (190°C)
- Difficulty: Beginner-friendly
Although the original recipe describes the bread as quick rise, the listed preparation, rising, and baking times add up to approximately 2 hours 40 minutes to 3 hours 5 minutes. Allow extra time if your kitchen is cool or your dough rises slowly.
Ingredients for Quick Rise French Bread
You only need five basic ingredients to prepare this bread.
1. All-Purpose Flour — 5 Cups
All-purpose flour provides the structure for the loaf. It is easy to find in most grocery stores and works well for everyday homemade bread.
For more consistent results, weigh your flour if possible. Five cups can vary considerably depending on how the flour is measured. A reasonable starting estimate is around 600–625 grams, but the actual weight depends on your flour and measuring method.
If using measuring cups, spoon the flour into the cup and level the top rather than packing it tightly.
2. Instant Yeast — 1 Tablespoon
Instant yeast is responsible for making the dough rise. It is convenient because you can mix it directly with the dry ingredients.
Check the expiration date before using it. Yeast that has lost its strength can leave you with a heavy loaf, even if you follow the instructions carefully.
Store opened yeast according to the manufacturer’s directions to help maintain its effectiveness.
3. Salt — 2½ Teaspoons
Salt gives bread its familiar savory flavor and helps regulate fermentation.
Measure it carefully. Too little salt can make bread taste flat, while too much may slow yeast activity and produce an overly salty loaf.
4. Sugar — 2½ Teaspoons
A small amount of sugar supports fermentation and adds a subtle sweetness.
You do not need to increase the sugar to make the bread rise. The yeast, water, temperature, and rising time all play important roles.
5. Warm Water — 2 Cups
Warm water brings the dough together and helps the yeast become active.
Aim for water around 100–110°F (38–43°C). It should feel warm rather than hot. If you have a kitchen thermometer, use it to check the temperature.
Water that is too hot can damage the yeast and interfere with the rise.
Equipment You Will Need
This recipe does not require expensive equipment. Most home kitchens already have everything needed.
- A large mixing bowl
- A wooden spoon or sturdy spatula
- Measuring cups and spoons or a kitchen scale
- A clean countertop or pastry board
- A clean kitchen towel or suitable bowl cover
- A lightly oiled bowl for rising
- A standard baking sheet
- A sharp knife or bread lame for scoring
- Oven mitts
- A cooling rack
A stand mixer fitted with a dough hook can reduce the effort involved in kneading, but it is optional. You can prepare the dough entirely by hand.
Parchment paper is also useful if your baking sheet tends to stick. Choose paper rated for your oven temperature.
How to Make Quick Rise French Bread Step by Step
Step 1: Mix the Dry Ingredients
Add the flour, instant yeast, salt, and sugar to a large mixing bowl.
Stir everything together so the yeast and salt are distributed throughout the flour.
This small step helps prevent concentrated pockets of salt or yeast in the finished dough. You do not need to mix for long; a few thorough stirs are enough.
Step 2: Add the Warm Water
Pour the warm water into the dry ingredients.
Mix with a wooden spoon or spatula until the flour absorbs the water and a rough dough forms.
At first, the dough may look uneven and sticky. That is normal. Continue mixing until there are no large patches of dry flour remaining.
If the dough seems excessively wet, wait a moment for the flour to absorb the water before adding more flour. Adding too much at this stage can make the finished loaf dry and heavy.
Step 3: Knead Until Smooth and Elastic
Transfer the dough to a lightly floured work surface.
Knead for approximately 8–10 minutes. Push the dough away from you with the heel of your hand, fold it back toward the center, and turn it slightly before repeating.
At the beginning, the dough may stick to your fingers and feel difficult to control. Use a light dusting of flour as needed, but avoid repeatedly adding large amounts.
As you knead, the dough should gradually become smoother and more elastic.
To check its consistency, gently press it with a finger. It should feel soft and springy rather than rough and crumbly.
If the dough tears immediately whenever you stretch it, it may need more kneading or a short rest to relax. Give it a few minutes before continuing rather than forcing it.
Step 4: Let the Dough Rise for the First Time
Lightly oil a clean bowl and place the dough inside. Turn it once so the surface is lightly coated.
Cover the bowl with a clean towel or suitable cover and leave it in a comfortable, draft-free location.
Allow the dough to rise for approximately 30–60 minutes, or until it has roughly doubled in size.
The exact time depends on the temperature of your kitchen and the strength of your yeast. In a warm room, the dough may rise relatively quickly. In a cooler kitchen, it may take longer.
Do not assume that 30 minutes will always be enough. Look at the dough before moving to the next step.
Helpful tip: Mark the dough’s starting height on the side of a transparent bowl if you want an easy way to judge how much it has expanded.
Step 5: Shape the Dough Into a Long Loaf
Once the dough has risen, transfer it to a lightly floured work surface.
Gently press out some of the larger air pockets without aggressively squeezing the dough.
Roll or pat it into a rectangle approximately 15 inches long, adjusting the width as needed to make a manageable loaf.
Starting from one long side, roll the dough into a log. Keep the roll reasonably tight so there are not large gaps trapped inside.
Pinch the seam closed with your fingers, then tuck the ends underneath.
The loaf should look elongated and reasonably even in thickness. It does not have to be perfectly shaped.
If one end is much thicker than the other, adjust it gently before placing the dough on the baking sheet. An uneven loaf can bake inconsistently, leaving a thin end overly browned while the thicker center needs more time.
Step 6: Prepare the Loaf for Its Second Rise
Line or lightly grease a baking sheet.
Place the shaped loaf seam-side down on the sheet. This helps keep the seam underneath as the bread expands.
Using a sharp knife or bread lame, make three diagonal cuts across the top, each approximately ½ inch deep.
These cuts are called scoring. They give the expanding dough a controlled place to open as it bakes.
Cover the loaf loosely and allow it to rise for another 30–60 minutes, until it looks noticeably puffier.
Avoid covering it so tightly that the cover presses against the dough. The loaf needs room to expand.
If the surface begins to dry out, check that the cover is providing enough protection from the air.
Step 7: Preheat the Oven
Toward the end of the second rise, preheat your oven to 375°F (190°C).
Allow the oven to reach the correct temperature before baking. An oven thermometer can be helpful if your oven tends to run hot or cold.
If you preheat too early and the loaf is not ready, simply leave the oven on and continue watching the dough. If the loaf has already become very puffy, avoid letting it rise indefinitely while you wait.
Step 8: Bake Until Golden Brown
Place the baking sheet on the center rack of the preheated oven.
Bake for approximately 40–45 minutes, checking the loaf toward the end of the baking time.
The bread should develop a golden-brown crust and feel firm when handled carefully with oven mitts.
A traditional way to check bread is to tap the underside and listen for a hollow sound. This can be useful, but it is not a perfect test by itself.
For greater confidence, use an instant-read thermometer inserted into the center of the loaf. A temperature around 190–205°F (88–96°C) is a useful range for many lean bread loaves.
If the outside is browning too quickly but the middle is not ready, reduce the oven temperature slightly or loosely shield the top with foil, making sure the bread continues baking safely.
Step 9: Cool Before Slicing
Remove the bread from the oven and carefully transfer it to a cooling rack.
Allow it to cool for at least 10 minutes, as the original recipe suggests. For cleaner slices and a more settled interior, waiting 20–30 minutes or longer is even better.
Cutting bread too soon can compress the crumb and make the center seem gummy.
Use a serrated bread knife and a gentle sawing motion. Pressing down too hard with a straight-edged knife can squash the soft interior.
Serve the bread warm once it has had enough time to settle.
What Makes This Bread Different From a Traditional Baguette?
French bread recipes vary, but a traditional baguette is usually long and narrow, with a crisp crust and a light, open crumb.
This quick-rise version is shaped into a larger loaf and baked on a standard baking sheet. Its interior may be somewhat tighter, making it especially useful for sandwiches and toast.
A traditional baguette often benefits from careful shaping, steam during baking, and a longer fermentation process. This recipe simplifies those steps for home cooks who want a dependable loaf without specialized equipment.
Neither style is necessarily better for every situation. If you need bread for a family meal, this larger loaf is convenient. If you want a very thin, crackly baguette, a dedicated baguette recipe may be a better choice.
Common Mistakes and How to Fix Them
The Dough Does Not Rise
If the dough barely changes in size, check the yeast’s expiration date and the water temperature.
A cold kitchen can slow the process considerably. Move the covered bowl to a slightly warmer location, away from direct heat, and give it more time.
Do not place the dough directly on a hot radiator or near an intense heat source. Excessive warmth can damage the yeast or cause uneven fermentation.
The Bread Turns Out Dense
Dense bread often comes from insufficient rising, too much flour, or inadequate kneading.
Make sure the dough becomes smooth and elastic during kneading. During the first rise, look for a noticeable increase in volume before shaping.
The second rise matters too. If you put a loaf into the oven while it is still tight and underproofed, it may not expand enough.
The Dough Is Too Sticky
Some stickiness is normal, particularly before kneading is complete.
Instead of pouring extra flour into the dough, lightly flour your hands and work surface. Give the dough time to develop elasticity.
If it remains extremely wet and difficult to shape, add flour a little at a time while kneading. Record what you change so you can adjust the next batch.
The Crust Is Too Hard
A darker, firmer crust is common in homemade bread, but excessive baking can make it unpleasantly hard.
Check the loaf near the end of the recommended baking time. Oven performance varies, so use the appearance and internal temperature as guides rather than relying entirely on the clock.
After baking, cool the bread on a rack. For a softer crust, store it in a suitable bread bag after it has cooled completely.
The Loaf Splits Along the Side
A loaf that bursts along the side may have been insufficiently scored or may have needed a longer second rise.
Make three clear diagonal cuts before baking and allow the dough to become noticeably puffy.
Do not make the cuts extremely shallow, but avoid cutting so deeply that the loaf loses its shape.
The Bread Is Brown Outside but Raw Inside
A large loaf can brown on the outside before its center finishes baking.
Check that your oven temperature is accurate and that the loaf is not excessively thick. If necessary, lower the temperature slightly and extend the baking time.
Always verify that the center is baked through before serving.
How to Store Homemade French Bread
Homemade bread tastes best when fresh, but proper storage can help you enjoy the rest of the loaf.
At room temperature: Allow the bread to cool completely, then wrap it or place it in a suitable bread bag. The recipe suggests storing it for up to three days. The crust will gradually soften, especially in an airtight bag.
For a crispier crust: Keep the cooled loaf in a paper bag or bread box. This allows more moisture to escape, although the bread may dry out sooner.
In the freezer: Slice the cooled loaf and place the slices in a freezer-safe bag. Remove as much excess air as practical and freeze for up to about three months for best quality.
To serve, toast frozen slices directly or thaw them before warming. You can also reheat larger portions in the oven until warmed through.
Avoid storing bread while it is still hot, because trapped steam can create condensation and leave the crust damp.
If the bread develops visible mold or an unusual spoiled smell, discard it rather than trying to salvage the unaffected-looking sections.
Best Ways to Serve Quick Rise French Bread
One reason this bread is useful is that it works with both simple snacks and full meals.
Make Large Family Sandwiches
Slice the loaf lengthwise or cut it into thick pieces for sandwiches. Fill it with cooked chicken, cheese, lettuce, tomatoes, eggs, or your preferred sandwich ingredients.
Because this is a larger home-style loaf, it can be easier to use for family sandwiches than a very narrow baguette.
Serve It With Soup
Pair thick slices with tomato soup, lentil soup, vegetable soup, or chicken broth.
The bread is ideal for dipping, especially when the crust is fresh and the inside is still soft.
Prepare French Toast
Slightly stale slices can work well for French toast because they absorb the egg mixture without immediately falling apart.
Dip the slices in a mixture of beaten egg, milk, and cinnamon, then cook them in a lightly buttered pan until golden and cooked through.
Make Garlic Bread
Combine softened butter with garlic and chopped herbs. Spread the mixture over slices of bread and warm them in the oven until the edges are crisp.
You can add a little grated cheese if you prefer a richer topping.
Serve It With Breakfast
A slice of homemade bread with eggs, butter, or jam makes a simple breakfast. Toasting leftover slices is also an easy way to refresh the texture the next day.
Frequently Asked Questions
Can I Make This French Bread Without a Stand Mixer?
Yes. A large bowl, wooden spoon, and clean countertop are enough. Knead the dough by hand for approximately 8–10 minutes until it becomes smooth and elastic.
Can I Use Active Dry Yeast Instead of Instant Yeast?
Yes, but the method may need a small adjustment. Active dry yeast can often be used in similar bread recipes, although some products benefit from dissolving in warm water first. Follow the yeast manufacturer’s instructions and make sure it is active before relying on it for the rise.
Why Does the Recipe Need Two Rises?
The first rise allows the dough to ferment and develop volume. The second rise lets the shaped loaf expand before baking.
Skipping the second rise can lead to a tighter crumb and uneven expansion in the oven.
Can I Prepare the Dough Ahead of Time?
You can prepare bread dough ahead, but refrigeration slows yeast activity and changes the timing. Cover the dough and refrigerate it if you need to delay baking, then allow it to warm and rise as appropriate before shaping or baking.
The exact schedule will depend on when you refrigerate the dough and how much it has already risen.
Can I Use Bread Flour Instead of All-Purpose Flour?
Yes. Bread flour usually contains more protein, which can produce a chewier loaf with a stronger structure.
Because different flours absorb water differently, the dough may feel slightly different. Add extra flour or water cautiously rather than changing the recipe substantially at the beginning.
Is This Bread Suitable for Sandwiches?
Absolutely. Its long shape and soft interior make it useful for large sandwiches, toasted sandwiches, and garlic bread.
Let the loaf cool sufficiently before cutting so the slices hold together.
How Can I Get a Better Crust at Home?
Start with a properly preheated oven, shape the loaf evenly, and make clear diagonal cuts across the surface.
For a more crackly crust, you may need a baking method that introduces steam, but only use cookware and steam techniques that are safe for your oven. Do not pour water onto a hot oven floor or into hot glass cookware.
Why Is My Bread Not as Light as Bakery French Bread?
Home ovens, flour types, fermentation, shaping, and baking conditions all affect the result.
Check that the dough rises enough, knead until elastic, and avoid adding excessive flour. If you want a very open crumb and thin, crackly crust, a traditional baguette method may be worth exploring after you become comfortable with this recipe.
Final Thoughts
This quick rise French bread recipe is a useful starting point if you want fresh homemade bread without complicated ingredients or specialized equipment. You can mix the dough in a bowl, knead it by hand, shape it on your countertop, and bake it on an ordinary baking sheet.
The biggest lesson is to pay attention to the dough instead of relying only on the clock. A good rise, careful shaping, and enough baking time make a noticeable difference in the final loaf.
Once you get comfortable with the basic method, try serving the bread with soup, turning leftovers into French toast, or making a large sandwich for lunch. It is a simple recipe that can fit naturally into everyday cooking, and you can adjust your timing as you learn how your own kitchen behaves.
