
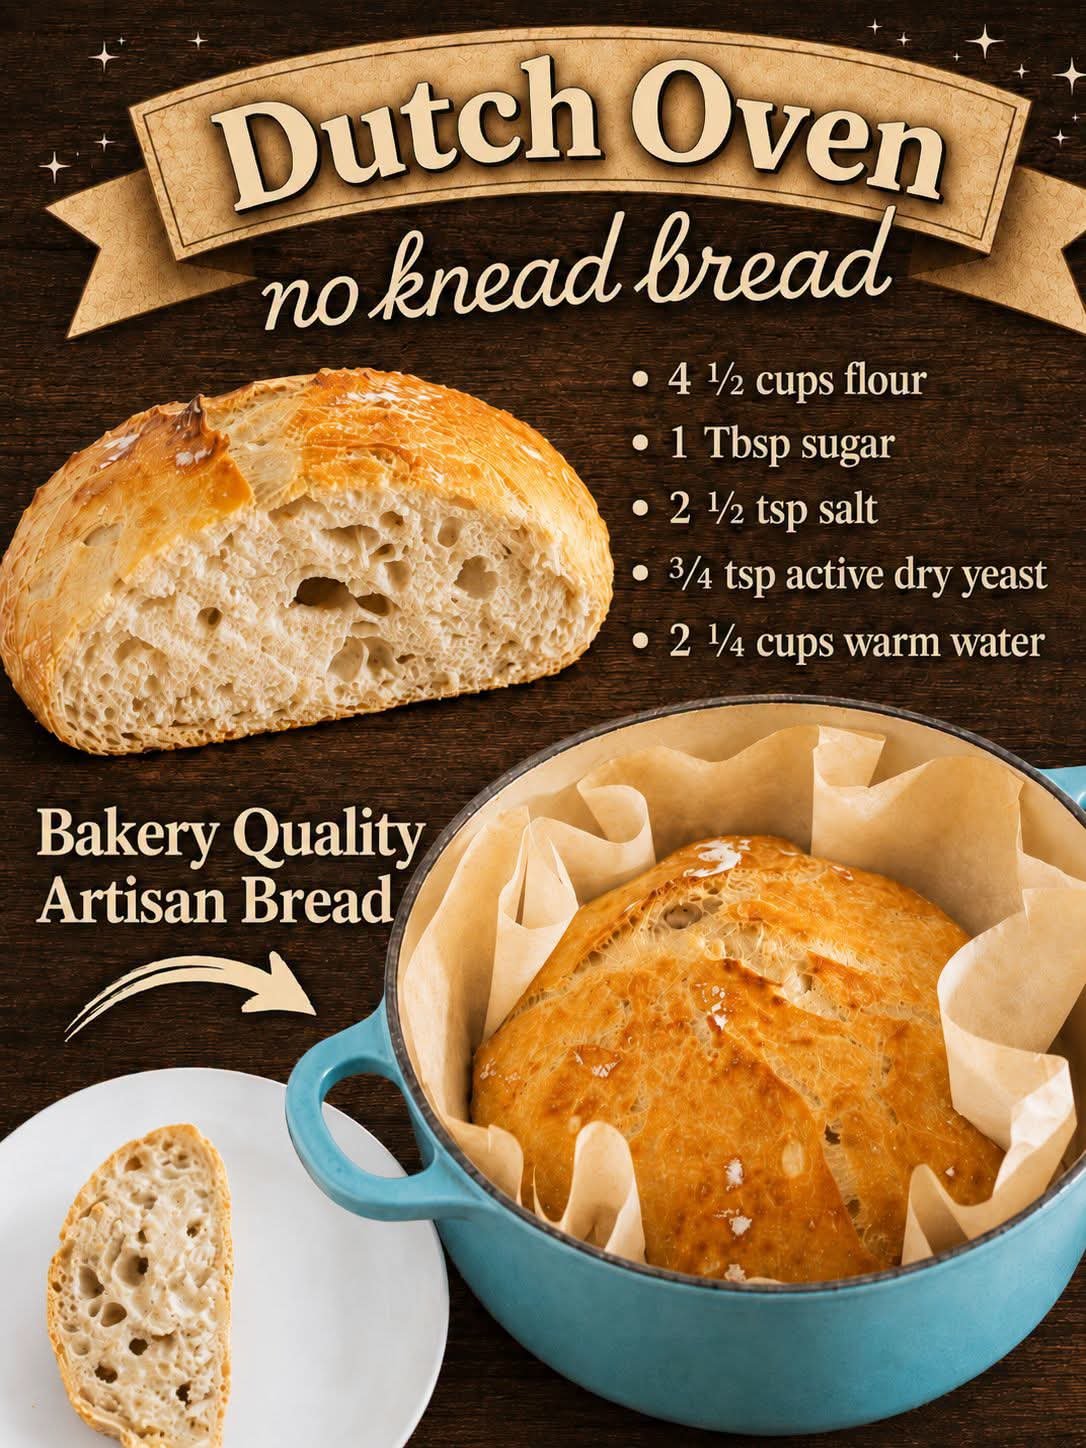
There is something special about cutting into a fresh loaf of homemade bread. The crust makes a gentle crackling sound, the inside is soft and airy, and the kitchen smells like a bakery. The best part? You do not need a stand mixer, expensive baking equipment, or strong kneading skills to make it happen.
Dutch oven no knead bread is a great option when you want homemade bread without spending your afternoon working with dough. You mix a few basic ingredients in a bowl, let the dough rest for several hours, and bake it in a hot Dutch oven. Most of the work happens while you are doing something else.
This recipe uses simple pantry ingredients, including all-purpose flour, yeast, salt, sugar, and warm water. The long resting period helps the dough develop flavor and structure, while the covered Dutch oven creates a steamy environment that encourages a crisp crust.
Whether you are new to baking or simply want an easier way to make fresh bread at home, this guide walks you through the process, explains what to watch for, and shares practical tips for avoiding common mistakes.
What Is Dutch Oven No Knead Bread?
Dutch oven no knead bread is a rustic homemade loaf made without the usual kneading process. Instead of working the dough for several minutes, you mix the ingredients until the flour is hydrated and allow time to do much of the work.
During the resting period, the yeast produces gas, helping the dough rise. The flour also absorbs water, and the dough gradually develops the structure needed to hold its shape.
The Dutch oven is the other important part of the process. Its heavy walls retain heat, and the lid traps moisture released by the dough during baking. This helps the loaf expand before the crust becomes firm.
The result is a loaf with a golden, crunchy exterior and a tender interior. It is excellent for breakfast toast, sandwiches, soups, or simply serving warm with butter.
Why You Will Love This Easy Bread Recipe
There are several reasons this bread deserves a place in your regular baking routine.
- Very little preparation: You can mix the ingredients in approximately five minutes.
- No kneading required: A spoon, spatula, or dough whisk is enough to bring everything together.
- Simple ingredients: You do not need milk, eggs, butter, or special bread flour.
- Flexible timing: The dough can rest while you work, prepare dinner, or take care of other tasks.
- A beautiful crust: Baking inside a covered Dutch oven helps produce a bakery-style exterior.
- Useful for everyday meals: Serve it with eggs, soup, cheese, sandwiches, or your favorite spread.
One thing worth remembering is that no knead bread is not necessarily quick bread. The preparation is fast, but the dough needs time to rise. Planning ahead makes the process much easier.
Recipe Overview
- Prep time: Approximately 5 minutes
- Resting time: 8–24 hours
- Additional resting time: 30 minutes
- Bake time: 45–50 minutes
- Total time: Approximately 8 hours 50 minutes or longer, depending on rising time
- Yield: 1 large loaf, approximately 12 servings
- Oven temperature: 450°F (232°C)
The timing can vary with room temperature, yeast activity, and the amount of time you allow the dough to rise. Use the dough’s appearance as well as the clock to judge when it is ready.
Ingredients for Dutch Oven No Knead Bread
You only need a handful of ingredients to make this loaf.
1. All-Purpose Flour
Use 4½ cups (585 grams) of all-purpose flour. This provides the main structure of the bread.
Measuring by weight is helpful because cups of flour can vary depending on how tightly the flour is packed. If you use measuring cups, gently spoon the flour into each cup and level the top rather than pressing it down.
2. Warm Water
You will need 2¼ cups of warm water, approximately 105°F (41°C).
The water should feel comfortably warm rather than hot. Very hot water can damage yeast, while cold water may slow the rise. A kitchen thermometer is useful, but it is not essential if you can measure the temperature reliably.
3. Active Dry Yeast
Use ¾ teaspoon (about 2 grams) of active dry yeast, or 1 teaspoon of instant yeast.
The small amount of yeast works because the dough rests for an extended period. If your yeast is old or has been stored improperly, the dough may rise slowly or fail to rise as expected.
4. Fine Sea Salt
Add 2½ teaspoons (about 14 grams) of fine sea salt.
Salt contributes flavor and helps regulate yeast activity. Try not to leave it out, because the finished loaf can taste surprisingly bland without it.
5. Sugar
Use 1 tablespoon (15 grams) of sugar.
The sugar adds a little flavor and supports the fermentation process. You do not need a large amount to make a flavorful loaf.
Optional Ingredients
- A little extra flour for shaping
- Cornmeal for dusting the Dutch oven
- Parchment paper to make transferring the dough easier
- Butter or jam for serving
You do not need to add oil to the dough. Keeping the ingredient list simple is part of what makes this recipe convenient.
Equipment You Will Need
The most important piece of equipment is a 4–6-quart Dutch oven with an oven-safe lid.
A heavy cast-iron Dutch oven is a popular choice because it retains heat well. An enameled Dutch oven can also work, provided its manufacturer confirms that it is safe at 450°F (232°C).
You will also need:
- A large mixing bowl
- A wooden spoon, spatula, or dough whisk
- Measuring cups and spoons or a kitchen scale
- A clean kitchen towel or suitable bowl cover
- A heat-resistant oven mitt
- A cooling rack
- A bread knife for slicing
If your Dutch oven has a lid knob, check its maximum oven-safe temperature before preheating it. Some knobs have lower temperature limits than the pot itself.
How to Make Dutch Oven No Knead Bread Step by Step
Step 1: Mix the Dry Ingredients
Add the flour, sugar, salt, and yeast to a large mixing bowl. Stir briefly so the ingredients are distributed throughout the flour.
Pour in the warm water and mix with a wooden spoon or spatula. Continue until you no longer see large patches of dry flour.
The dough should look rough, uneven, and sticky. It will not resemble the smooth dough you might expect from traditional kneaded bread.
That is normal. Resist the temptation to keep adding flour just because the dough sticks to your spoon.
If there are a few stubborn dry spots, continue mixing until they absorb the water. A tablespoon of extra flour can help if the dough is genuinely difficult to handle, but adding too much can make the finished bread dense.
Step 2: Cover and Let the Dough Rise
Cover the bowl with a clean kitchen towel or suitable cover. If using plastic wrap, make sure it is food-safe and keep it away from direct heat.
Leave the bowl at room temperature for approximately 8–24 hours.
During this period, the dough gradually becomes puffier and develops bubbles. Depending on your room temperature, it may rise faster or slower than expected.
A cooler kitchen generally slows fermentation, while a warmer kitchen speeds it up. The dough should not be judged by time alone.
For a practical schedule, mix the dough in the morning if you want to bake in the evening, or prepare it in the evening for baking the following day.
A useful tip: Place the bowl somewhere away from direct sunlight, heaters, and strong drafts. A stable room temperature makes the rise easier to manage.
Some versions of this recipe allow refrigerated storage for extended periods, but dough development changes in the refrigerator. If you prepare it ahead, keep it covered and assess its condition before shaping. Do not assume refrigerated dough will be ready to bake at exactly the same time as dough left at room temperature.
Step 3: Prepare the Dough for Shaping
When the dough has risen, sprinkle flour over a clean work surface. Lightly flour your hands as well.
Gently transfer the dough onto the surface. It will probably feel soft, sticky, and slightly elastic.
Do not punch it down aggressively or knead it like traditional bread dough. Instead, gently pull the edges toward the center, working around the dough until you form a rough round shape.
Turn the dough so the gathered edges are underneath. Use your hands to gently encourage it into a ball.
It does not have to look perfect. The goal is to create a reasonably rounded loaf without pressing out all the air that developed during fermentation.
Transfer the shaped dough to a lightly floured bowl or onto parchment paper. Cover it and allow it to rest for approximately 30 minutes while the oven and Dutch oven preheat.
Step 4: Preheat the Oven and Dutch Oven
Set your oven to 450°F (232°C).
Place the empty Dutch oven and its lid inside the oven and preheat them for approximately 30 minutes.
This step matters because the dough needs to enter a hot baking environment. A properly heated pot helps the loaf begin expanding and developing its crust.
Be careful when handling the Dutch oven. The pot, lid, and handles can become extremely hot, even if they look no different from their usual appearance.
Use oven mitts, clear a safe space on your counter, and keep children away from the hot equipment.
If your Dutch oven manufacturer advises against empty preheating, follow those instructions instead and use a compatible baking method.
Step 5: Transfer the Dough to the Hot Pot
Carefully remove the hot Dutch oven from the oven and place it on a heat-resistant surface.
Sprinkle a small amount of cornmeal into the bottom if desired. Alternatively, use a piece of parchment paper rated for the baking temperature.
Transfer the dough into the pot. Parchment can make this step easier because you can lift the dough by the edges of the paper, provided the paper is suitable for the temperature and is used according to its instructions.
If you like the appearance of traditional artisan bread, make one or two shallow cuts across the top with a sharp bread knife or bread lame. These cuts give the expanding loaf a place to open during baking.
Do not worry if your first loaf has an uneven shape. Homemade artisan bread often has a naturally rustic appearance.
Step 6: Bake with the Lid On
Cover the Dutch oven and bake for approximately 30 minutes.
During this stage, the trapped moisture helps delay crust formation while the loaf expands. This is one of the main advantages of baking bread in a covered Dutch oven.
Avoid lifting the lid repeatedly to check the bread. Opening the pot releases heat and steam, which can interfere with consistent baking.
After about 30 minutes, carefully remove the lid using oven mitts.
Step 7: Finish Baking Without the Lid
Continue baking uncovered for another 15–20 minutes, or until the crust is a deep golden brown.
The exact time depends on your oven, the shape of the loaf, and how dark you like the crust.
If the bread looks pale after the first 15 minutes uncovered, give it a little longer. The surface should develop a firm, attractive crust.
You can also listen for a hollow sound when you gently tap the underside of the loaf after removing it from the pot. This is a useful traditional check, although it is not a perfect guarantee that the center is fully baked.
For a more objective check, an instant-read thermometer can help you assess the center of the loaf. Many lean breads finish baking at an internal temperature around 200–210°F (93–99°C).
Step 8: Cool Before Slicing
Transfer the bread to a cooling rack and let it rest for at least 30 minutes.
It may be tempting to cut into the loaf immediately, especially when the crust smells wonderful. However, the inside continues to settle as the bread cools.
Cutting too early can make the crumb appear gummy or compressed, even when the loaf has baked properly.
Once cooled, use a serrated bread knife to slice it into even pieces. Serve with butter, jam, cheese, eggs, or a bowl of warm soup.
What Should the Dough Look Like Before Baking?
One of the most confusing parts of no knead bread is knowing whether the dough is right.
Before rising, it should be sticky and shaggy rather than smooth. After a long rest, it should generally look puffier and contain visible bubbles.
When you transfer it to the counter, it may spread somewhat. That does not automatically mean something went wrong.
However, if the dough remains completely flat, shows little fermentation, or smells unusually unpleasant, check your yeast, water temperature, and rising conditions.
A dough that has risen too far may become fragile and collapse easily when handled. In that case, shape it gently and proceed, but understand that the finished loaf may have less volume.
The goal is not to make the dough look perfect. It is to recognize the normal changes that occur during fermentation.
Common Mistakes to Avoid
Adding Too Much Flour
Sticky dough can feel difficult to work with, especially for beginners. Adding handfuls of flour may seem like an easy fix, but it changes the dough’s hydration and can produce a heavier loaf.
Use lightly floured hands and a scraper instead. Add only a small amount of extra flour when necessary.
Using Water That Is Too Hot
Very hot water can weaken or kill yeast, preventing the dough from rising properly.
Measure the water temperature if possible. Approximately 105°F (41°C) is suitable for this recipe.
Not Allowing Enough Rising Time
No knead bread relies heavily on fermentation. If the dough is baked before it has developed enough gas and structure, the loaf may turn out smaller and denser.
Allow sufficient time and look for visible signs of activity.
Skipping the Dutch Oven Preheat
A cold pot does not provide the same initial heat as a properly preheated Dutch oven. This can affect the loaf’s expansion and crust.
Preheat the pot for approximately 30 minutes, provided your cookware is designed for empty preheating.
Removing the Lid Too Early
The covered stage creates the moist environment needed during the first part of baking. Removing the lid too early can change the crust and affect the loaf’s expansion.
Keep the pot covered for the first 30 minutes, then uncover it to brown the crust.
Slicing the Bread While It Is Hot
Fresh bread can seem fully baked on the outside while the interior is still settling.
Give the loaf at least 30 minutes to cool. Waiting longer generally makes it easier to cut neat slices.
Practical Tips for Better Results
Weigh the Flour When Possible
A kitchen scale removes much of the guesswork from measuring flour. The recipe calls for 585 grams, which is more consistent than relying on loosely or tightly packed cups.
If you bake frequently, a basic digital kitchen scale is a useful investment.
Keep an Eye on Room Temperature
A dough that rises well in a warm kitchen may need more time in a cooler one.
Instead of following the clock blindly, observe the dough. Look for bubbles, increased volume, and a soft, airy appearance.
Use Parchment Paper for Easier Handling
Sticky dough can be awkward to transfer into a hot pot. Parchment paper can help you move it with less handling.
Make sure the paper is rated for the baking temperature and follow the manufacturer’s safety guidance.
Adjust the Crust to Your Preference
For a lighter crust, begin checking the loaf near the lower end of the uncovered baking time. For a darker, crunchier exterior, allow additional baking time while watching closely to avoid burning.
Let the Bread Cool Completely for Storage
Moisture escapes from freshly baked bread as it cools. Packing it away while warm can create condensation and soften the crust.
Let it cool on a rack before storing it.
How to Store Dutch Oven No Knead Bread
Homemade bread does not contain the same preservatives as many commercial loaves, so storage makes a difference.
At room temperature: Store the completely cooled loaf in a paper bag or bread box if you want to help preserve its crust. It is best enjoyed within a few days. A paper bag allows more moisture to escape than an airtight plastic bag, although the bread may dry out sooner.
For a softer crust: A suitable reusable bread bag or loosely closed food-storage bag can help retain moisture, but the crust will gradually soften.
In the freezer: Slice the cooled bread and freeze the slices in a freezer-safe bag or container. Separating slices makes it easier to remove only what you need. For best quality, aim to use frozen bread within about three months.
To serve frozen slices, place them directly in a toaster or allow them to thaw before warming. For a larger piece, reheat it in the oven until warmed through.
Discard bread that develops visible mold or an unusual spoiled smell. Do not try to save moldy portions by cutting around them.
Easy Ways to Serve Homemade Dutch Oven Bread
This bread is versatile enough for breakfast, lunch, dinner, and snacks.
Breakfast Toast
Toast a slice and add butter, jam, peanut butter, or a cooked egg. The crisp crust and soft center work well with both sweet and savory toppings.
Soup and Stew
Serve thick slices alongside tomato soup, lentil soup, vegetable stew, or chicken soup. The bread is useful for soaking up the remaining broth.
Simple Sandwiches
Use cooled slices for cheese sandwiches, egg sandwiches, or sandwiches filled with cooked chicken and vegetables.
Because the loaf has a rustic crumb, slices may be less uniform than commercial sandwich bread. A serrated knife helps create more even pieces.
Garlic Bread
Mix softened butter with minced garlic and chopped herbs. Spread it over sliced bread and warm briefly in the oven until the edges become crisp.
A Simple Snack
A warm slice with butter and a pinch of salt can be satisfying without needing a complicated topping.
Can You Make This Recipe Without a Dutch Oven?
Yes, but the result may differ.
A heavy, oven-safe covered pot is the closest alternative, provided it can safely withstand the baking temperature. Always check the manufacturer’s temperature limits for the pot, lid, and handles.
If you do not have suitable covered cookware, you can use a baking method designed specifically for an ordinary baking sheet or oven-safe dish. However, the crust may not be identical because the moisture and heat conditions will be different.
Never place a glass dish or other cookware into a hot oven unless its manufacturer confirms that it is suitable for that use. Sudden temperature changes can cause some materials to crack or shatter.
Frequently Asked Questions
Why Is My No Knead Bread Dense?
A dense loaf can result from inactive yeast, insufficient rising time, excessive flour, or dough that has risen too far and lost its structure.
Start by checking the yeast’s freshness and measuring the flour accurately. Then allow the dough to develop until it looks noticeably puffier and shows signs of fermentation.
Why Is My Bread Sticky Inside?
The loaf may have been underbaked or sliced before it cooled. Excessive hydration or weak fermentation can also affect the crumb.
Make sure the crust has browned properly, extend the baking time if needed, and allow at least 30 minutes of cooling before cutting.
Can I Prepare the Dough the Night Before?
Yes. Mixing the dough in the evening is a convenient way to prepare for baking the next day.
Because fermentation speed depends on temperature, check the dough before shaping. If it has risen substantially, looks bubbly, and is ready to handle, proceed rather than waiting for an exact number of hours.
Can I Use Instant Yeast Instead of Active Dry Yeast?
Yes. This recipe can use 1 teaspoon of instant yeast instead of ¾ teaspoon of active dry yeast.
Instant yeast can generally be mixed directly with the dry ingredients. The dough still needs enough time to rise and develop its structure.
Is a Dutch Oven Necessary for Artisan Bread?
A Dutch oven is not the only way to bake artisan-style bread, but it makes the process easier by retaining heat and trapping moisture.
Other baking methods can work, although you may need to adjust the temperature, timing, or moisture management.
How Do I Know When the Bread Is Done?
Look for a well-browned crust and a loaf that feels firm rather than soft and pale. A hollow sound when tapped is another traditional clue.
An instant-read thermometer provides an additional check. For this style of bread, an internal temperature around 200–210°F (93–99°C) is a useful target.
Can I Make the Bread Without Sugar?
Sugar contributes a little flavor and can support fermentation, but yeast can also ferment the naturally occurring sugars released from flour. Omitting sugar may change the flavor and browning, so the result will not be exactly the same as this recipe.
Can I Freeze the Whole Loaf?
Yes. Allow the bread to cool completely, wrap it well, and place it in a freezer-safe bag or container. Slicing before freezing is often more convenient, but freezing the whole loaf is also an option.
For the best texture, use it within approximately three months.
Final Thoughts
Easy Dutch oven no knead bread is a practical way to enjoy homemade artis
