The first time I baked rosemary garlic sourdough bread, I wasn’t trying to make anything fancy. I simply had a healthy sourdough starter sitting on my kitchen counter, a few sprigs of fresh rosemary from the garden, and a head of garlic that needed to be used before it went bad.
A few hours later, my kitchen smelled better than any bakery I had visited that week.
What surprised me most wasn’t just the aroma—it was how well the flavors worked together. The slight tang from the sourdough, the sweetness of roasted garlic, and the earthy fragrance of rosemary created a loaf that tasted far more impressive than the effort I put into it.
Since then, this has become one of my favorite sourdough recipes. Whenever friends come over for dinner, this is usually the bread I bake. It pairs beautifully with soups, pasta dishes, salads, and even a simple plate of olive oil and butter.
If you’re already comfortable making sourdough, you’ll love the extra flavor this recipe brings. And if you’re new to sourdough baking, don’t worry. I’ll walk you through everything step by step and share a few lessons I learned from my own mistakes along the way.
Why Rosemary and Garlic Work So Well in Sourdough
Sourdough bread already has a deep, complex flavor thanks to natural fermentation. Unlike commercial yeast breads, sourdough develops a mild tanginess and a chewy texture that feels more satisfying with every bite.
Adding roasted garlic introduces a rich savory sweetness. Fresh garlic can sometimes be overpowering, but roasting transforms it completely. The sharpness fades away, leaving behind a buttery, mellow flavor.
Rosemary brings something different. Its woodsy aroma gives the bread a rustic character that feels comforting and homemade. Together, rosemary and garlic create a combination that tastes elegant without being complicated.
Another thing I appreciate about sourdough is that many people find it easier to digest than standard bread because of the fermentation process. While everyone is different, it’s one reason sourdough continues to be so popular among home bakers.
Ingredients You’ll Need
For one large loaf:
- 500 grams bread flour
- 100 grams whole wheat flour
- 350 grams room-temperature water
- 100 grams active sourdough starter (fed and bubbly)
- 10 grams fine sea salt
- 2 tablespoons olive oil
- 3 tablespoons fresh rosemary, chopped
- 5 to 6 cloves roasted garlic, mashed
- Extra flour for dusting
Before You Start
Make sure your sourdough starter is active.
One mistake I made early on was using a starter that looked alive but hadn’t fully peaked. The result was a dense loaf that barely rose.
A healthy starter should be bubbly, airy, and roughly doubled in size after feeding.
Step 1: Feed the Starter
Several hours before mixing the dough, feed your sourdough starter using equal parts flour and water.
Wait until it becomes bubbly and active. This step is essential because your starter acts as the natural leavening agent that helps the bread rise.
If the starter isn’t active enough, the entire loaf can suffer.
Step 2: Mix the Flour and Water
In a large bowl, combine:
- Bread flour
- Whole wheat flour
- Water
Mix until no dry flour remains.
At this stage, the dough will look messy and sticky. That’s perfectly normal.
Cover the bowl and allow it to rest for 30 minutes.
This process, known as autolyse, gives the flour time to absorb water and begin developing gluten naturally.
I used to skip this step because I was impatient. Once I started including it, my dough became much easier to handle.
Step 3: Add the Starter and Salt
Add the active starter and sea salt to the dough.
Mix thoroughly by folding and gently squeezing the dough until everything is incorporated.
The dough should begin feeling stronger and more elastic.
Don’t worry if it still sticks to your hands. Sourdough dough is naturally wetter than many traditional bread doughs.
Step 4: Incorporate Rosemary, Garlic, and Olive Oil
Add:
- Olive oil
- Roasted garlic
- Chopped rosemary
Fold everything into the dough carefully.
This is usually my favorite part of the process because the aroma starts developing immediately.
As the rosemary and garlic spread throughout the dough, you’ll notice the scent becoming richer with every fold.
Step 5: Bulk Fermentation
Cover the bowl and leave the dough at room temperature for approximately 4 to 5 hours.
During the first two hours, perform stretch-and-fold sessions every 30 minutes.
How to Stretch and Fold
- Grab one side of the dough.
- Stretch it upward gently.
- Fold it over the center.
- Rotate the bowl.
- Repeat on all sides.
This strengthens the dough without traditional kneading.
By the end of bulk fermentation, the dough should appear puffier and noticeably larger.
Step 6: Shape the Dough
Lightly flour your work surface.
Turn out the dough and shape it into either:
- A round boule
- An oval batard
Try not to press out all the trapped air.
Those air pockets help create the beautiful open crumb that sourdough bakers love.
Transfer the shaped dough into a floured proofing basket or a bowl lined with a floured kitchen towel.
Step 7: Cold Proof Overnight
Cover the dough and place it in the refrigerator.
Allow it to proof for 8 to 12 hours.
This overnight fermentation is where much of the flavor develops.
I’ve baked loaves both with and without an overnight proof, and the difference is noticeable. The longer fermentation creates deeper flavor, better texture, and improved crust color.
Step 8: Preheat the Oven
Place a Dutch oven inside your oven.
Preheat to:
230°C (450°F)
Allow the Dutch oven to heat fully before baking.
A hot Dutch oven creates steam around the loaf, which helps develop a crispy, professional-looking crust.
Step 9: Score the Dough
Remove the dough from the refrigerator.
Transfer it onto parchment paper.
Using a sharp knife or bread lame, make a shallow cut across the surface.
Scoring isn’t just decorative.
Without a score, the bread may crack unpredictably as it expands in the oven.
Step 10: Bake the Bread
Carefully place the dough into the hot Dutch oven.
Bake:
- 25 minutes with the lid on
- 20 to 25 minutes with the lid removed
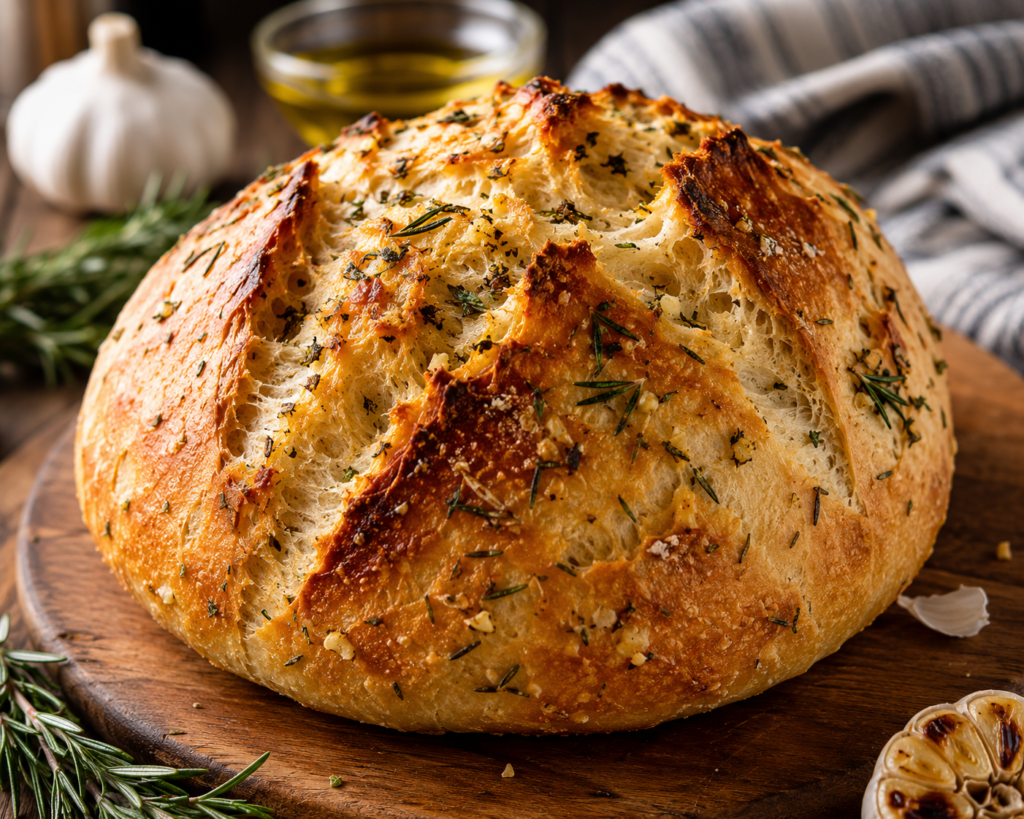
The crust should become a rich golden brown.
At this point, your kitchen will smell incredible.
The combination of rosemary, garlic, and freshly baked bread creates the kind of aroma that makes people wander into the kitchen asking when it’s ready.
Step 11: Cool Before Slicing
This is the hardest step.
Take the loaf out and place it on a wire rack.
Allow it to cool completely.
I know it’s tempting to cut into it immediately. I’ve done it many times.
Unfortunately, slicing too early can make the crumb gummy and dense.
Waiting an hour is absolutely worth it.
Common Mistakes to Avoid
Using Raw Garlic Instead of Roasted Garlic
Raw garlic can overpower the loaf.
Roasting softens the flavor and adds sweetness.
Rushing Fermentation
Sourdough rewards patience.
If the dough hasn’t fermented properly, the texture and flavor won’t fully develop.
Adding Too Much Flour
Many beginners add flour whenever the dough feels sticky.
I made this mistake repeatedly.
Sticky doesn’t always mean wrong. High-hydration dough often produces the best crumb.
Cutting Too Soon
Fresh bread smells amazing, but patience matters.
Allow the loaf to cool completely before slicing.
Serving Ideas
One reason I bake this bread so often is its versatility.
Here are a few favorite ways to enjoy it:
- Served alongside tomato soup
- Paired with creamy pasta dishes
- Used for gourmet grilled cheese sandwiches
- Dipped in olive oil and balsamic vinegar
- Toasted with butter for breakfast
- Used for homemade croutons
I’ve even turned leftover slices into garlic bread, which somehow makes the garlic flavor even better.
Storage Tips
To keep the crust crisp:
- Store in a paper bag or bread box.
- Avoid plastic bags whenever possible.
For longer storage:
- Slice the loaf.
- Freeze individual slices.
- Reheat directly from frozen.
This method keeps the bread tasting fresh for weeks.
Nutrition Details
| Nutrient | Per Loaf (Approx.) | Per Slice |
|---|---|---|
| Calories | 1500 kcal | 120 kcal |
| Carbohydrates | 280 g | 22 g |
| Protein | 55 g | 4 g |
| Fat | 25 g | 2 g |
| Fiber | 12 g | 1 g |
| Sugar | 2 g | 0.2 g |
| Sodium | 1800 mg | 140 mg |
| Iron | 10 mg | 0.8 mg |
| Calcium | 90 mg | 7 mg |
Why I Keep Coming Back to This Recipe
There are dozens of sourdough recipes I enjoy making, but rosemary garlic sourdough remains one of the most rewarding.
The ingredients are simple, yet the final loaf feels special every time. It turns an ordinary meal into something memorable and fills the kitchen with an aroma that instantly makes a house feel like home.
What I appreciate most is that every loaf develops a little personality of its own. Some rise higher, some develop bigger air pockets, and some produce an extra-crispy crust. That’s part of the charm of sourdough baking.
If you’ve been looking for a bread recipe that’s both comforting and impressive, this Rosemary Garlic Sourdough Bread is worth adding to your baking routine. Once you pull that golden loaf from the oven and hear the crust crackling as it cools, you’ll understand why so many home bakers become obsessed with sourdough.
Disclaimer
This recipe is shared for informational and educational purposes only. Nutritional values are approximate and may vary depending on ingredient brands, measurements, and serving sizes. Individual dietary needs, allergies, and health conditions differ from person to person. If you have specific medical concerns or dietary restrictions, consult a qualified healthcare professional before making significant changes to your diet.