
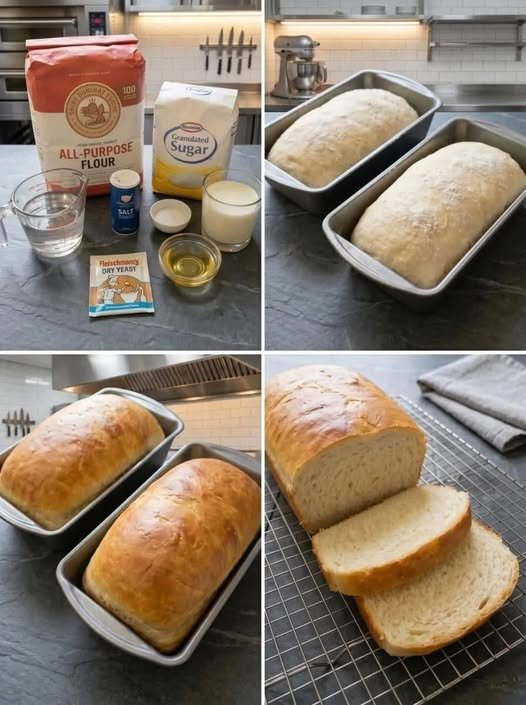
The first time I made a proper sourdough loaf at home, I made one very common mistake: I watched the clock more than I watched the dough.
The recipe said the dough should rise in a certain number of hours, so I kept waiting for that exact point. The problem was that my kitchen was cooler than usual, and the dough simply wasn’t ready. When I finally baked it, the loaf was much flatter and denser than I expected.
That experience taught me something important about sourdough: the clock is only a guide. The dough itself tells you when it is ready.
This sourdough bread loaf recipe is one I like because it doesn’t require complicated equipment or constant attention. Most of the process is simply mixing, folding, waiting, shaping, and letting the dough rest overnight in the refrigerator.
The finished loaf has a crisp crust, a soft and chewy center, and a gentle sourdough flavor. It is especially good when sliced thick and toasted with butter, served alongside soup, or turned into a simple breakfast sandwich.
The recipe makes one loaf and uses a Dutch oven to create the steam needed for a good crust and oven rise.
Sourdough Bread Loaf at a Glance
- Yield: 1 loaf
- Active Prep Time: About 30 minutes
- Bulk Fermentation: 4–6 hours
- Cold Proof: 12–16 hours
- Bake Time: 45–50 minutes
- Total Time: About 13–17 hours
- Difficulty: Intermediate
Remember that fermentation can change quite a bit depending on the temperature of your kitchen and how active your starter is.
What Makes This Loaf Work?
There are four things I pay the most attention to when making sourdough:
- An active starter
- Proper fermentation
- Good surface tension during shaping
- A thoroughly preheated Dutch oven
You don’t need to become an expert at sourdough terminology to make this bread. Once you start making it regularly, you’ll naturally learn what properly fermented dough looks and feels like.
Ingredients
For one loaf, you’ll need:
- 100g active sourdough starter
- 375g warm water, around 75–80°F (24–27°C)
- 450g bread flour
- 50g whole wheat flour
- 10g fine sea salt
For Dusting
- Rice flour
- All-purpose flour
I strongly recommend using a digital kitchen scale for this recipe. Measuring flour with cups can introduce quite a bit of variation, especially with sourdough, where the dough’s hydration matters.
Equipment You’ll Need
You don’t need a huge collection of baking equipment.
These are the things I find most useful:
- Digital kitchen scale
- Large mixing bowl
- Bench scraper
- Proofing basket or banneton
- Clean kitchen towel
- Bread lame or sharp razor
- Parchment paper
- Dutch oven with lid
- Wire cooling rack
A bench scraper is particularly useful when handling sticky dough. Before I started using one, I used to add extra flour whenever dough stuck to the counter. That usually made things worse.
Step 1: Make Sure Your Starter Is Active
This is the part I wouldn’t rush.
If your starter is sitting in the refrigerator or hasn’t been fed recently, give it some attention before starting the bread.
For a fresh feeding, combine:
- 20g sourdough starter
- 100g warm water
- 100g bread flour
Mix everything in a clean jar and cover it loosely.
Leave it at room temperature until it has roughly doubled in size and looks bubbly. Depending on your room temperature and starter, this can take several hours.
A healthy starter should look lively rather than flat and inactive.
One lesson I learned
Don’t judge your starter only by how many hours have passed.
Sometimes mine has doubled much faster than expected on a warm day. On a cooler day, it can take much longer.
If the starter has doubled, looks bubbly, and has a slightly rounded top, that’s a much better indication that it is ready.
Step 2: Mix the Flour and Water
Add the following to a large bowl:
- 450g bread flour
- 50g whole wheat flour
- 375g warm water
Mix everything together using your hand or a dough whisk.
At this point, don’t worry if the dough looks rough.
There may be dry-looking patches at first, but continue mixing until all the flour has been hydrated.
Cover the bowl and let the mixture rest for 30–60 minutes.
The dough will usually feel different after this rest. It becomes softer and easier to work with.
Step 3: Add the Starter and Salt
Add 100g active sourdough starter to the dough.
Wet your hands and gently pinch and fold the dough until the starter is distributed throughout.
I prefer wet hands at this stage rather than throwing extra flour onto the dough. Sourdough dough can feel sticky, but that doesn’t automatically mean something is wrong.
Let the dough rest for about 30 minutes.
Now add the 10g salt.
If it is difficult to incorporate, mix the salt with a tiny splash of water first.
Use your fingers to gently squeeze, pinch, and fold the dough until the salt disappears into the mixture.
It may feel messy at first. That’s completely normal.
Step 4: Bulk Fermentation
Cover the bowl and leave the dough at room temperature for approximately 4–6 hours.
This is one of the stages where I recommend paying more attention to the dough than the recipe’s exact timing.
During the first 2–3 hours, perform coil folds about every 30 minutes.
How I Do a Coil Fold
- Wet your hands.
- Slide both hands underneath the center of the dough.
- Gently lift the dough.
- Allow the ends to fold underneath.
- Rotate the bowl slightly.
- Repeat the process 3–4 times.
After a few rounds, the dough should become noticeably smoother and stronger.
You don’t need to keep touching it throughout the entire fermentation period.
Once the dough has enough strength and starts holding its shape, leave it alone.
How Do You Know Bulk Fermentation Is Finished?
This was one of the hardest things for me to learn when I first started making sourdough.
The dough doesn’t have to double in size.
Instead, look for several signs together.
The dough should:
- Increase in volume by roughly 30–50%
- Look smoother
- Have visible bubbles around the sides
- Feel lighter
- Jiggle slightly when you move the bowl
- Hold its shape better than it did earlier
If it still looks dense and hasn’t changed much, don’t rush to the next step.
Give it more time.
A cool kitchen can make fermentation considerably slower.
Step 5: Pre-Shape the Dough
Lightly flour your work surface.
Use a bench scraper to gently release the dough from the bowl and place it on the counter.
Try not to squash all the air out.
Gently shape the dough into a loose round.
Let it rest uncovered for approximately 20–30 minutes.
This short bench rest allows the dough to relax and makes final shaping easier.
If the dough immediately spreads completely across the counter, it may need more strength or may have fermented too far. This is one reason I like to observe the dough before shaping rather than blindly following a timer.
Step 6: Shape the Loaf
Lightly flour the top of the dough and turn it over.
Fold the bottom section toward the middle.
Fold both sides inward.
Then bring the top section toward the center.
Gently roll or fold everything into a round.
Now comes the part where you create surface tension.
Using your bench scraper, gently pull the dough toward yourself across the counter.
You aren’t trying to drag it aggressively.
The goal is to tighten the outside of the dough while keeping the inside soft.
The finished dough should look smooth and reasonably tight.
Step 7: Transfer to the Banneton
Dust your proofing basket generously with a mixture of rice flour and all-purpose flour.
I particularly like rice flour for this job because it doesn’t become as sticky as regular wheat flour when it comes into contact with moist dough.
Place the shaped dough into the basket seam-side up.
Cover it with a clean kitchen towel or reusable proofing cover.
Step 8: Cold Proof Overnight
Place the covered banneton in the refrigerator for 12–16 hours.
This overnight rest is one of my favorite parts of making sourdough.
There’s very little work involved. You put the shaped dough into the refrigerator and let time do most of the work.
The cold dough is also easier to score the next morning.
You can bake it directly from the refrigerator without bringing it back to room temperature first.
Step 9: Preheat the Dutch Oven
The next morning, place your Dutch oven and its lid inside the oven.
Preheat everything to:
475°F (245°C)
Let it heat for at least 45 minutes.
Don’t underestimate this step.
A Dutch oven that hasn’t heated properly can affect the initial oven spring and crust.
Step 10: Score the Dough
Take the cold dough from the refrigerator.
Place parchment paper on your work surface.
Carefully turn the dough onto the parchment.
Use a sharp bread lame or razor to make one confident slash across the top.
Don’t slowly drag a dull blade through the dough.
A clean cut gives the loaf a controlled area to expand as it rises in the oven.
You can also add small decorative cuts if you’d like, but one good expansion slash is enough for a simple loaf.
Step 11: Bake the Sourdough Bread
Carefully transfer the dough into the hot Dutch oven.
Put the lid on.
Bake at 475°F (245°C) for 25 minutes.
Then remove the lid and reduce the temperature to:
450°F (230°C)
Continue baking for another 20–25 minutes.
The crust should become a deep golden brown.
If you prefer a darker and crunchier crust, you can leave it in for a few additional minutes, but keep a close eye on it.
The uncovered portion of the bake is where the crust can darken surprisingly quickly.
Step 12: Don’t Slice It Too Early
This is probably the hardest step because your kitchen will smell incredible.
But wait.
Transfer the loaf to a wire rack and let it cool for at least 3–4 hours before slicing.
The inside continues to set while the loaf cools.
I know it is tempting to cut into the bread after 20 or 30 minutes. I’ve done it, and the crumb can end up looking gummy even when the loaf itself was baked properly.
Once completely cooled, use a serrated bread knife and slice gently.
Common Mistakes I Would Avoid
1. Using a Weak Starter
If the starter isn’t active enough, the dough may take much longer to ferment.
Don’t assume the dough is ready just because the recipe says six hours have passed.
Look for bubbles, volume increase, and a lighter texture.
2. Adding Too Much Flour
Sticky dough can make beginners nervous.
The natural reaction is often to keep adding flour.
I’ve learned that this can quickly turn a soft sourdough into a much heavier loaf.
Wet your hands and use a bench scraper instead.
3. Following the Clock Blindly
A recipe might say four hours, but your kitchen isn’t necessarily the same temperature as the recipe author’s kitchen.
Temperature, starter strength, flour, and dough conditions can all affect fermentation.
Use the timing as a starting point rather than a strict rule.
4. Skipping the Preheat
A Dutch oven needs time to become properly hot.
Putting sourdough into a barely heated pot can reduce the dramatic rise you are hoping for.
Give the oven and Dutch oven plenty of time.
5. Cutting the Bread While Hot
This is another mistake that’s easy to make.
Let the loaf cool properly.
The bread will slice more cleanly, and the crumb will have time to finish setting.
Sourdough Troubleshooting
Why didn’t my dough rise?
The starter may not have been active enough, or your kitchen may have been too cool.
Give the dough additional time and check your starter before the next bake.
Why is my loaf flat?
Several things can cause a flat loaf, including under-fermentation, over-fermentation, or insufficient shaping tension.
Look at the dough’s behavior rather than assuming one problem.
Why is my crust pale?
Make sure both the oven and Dutch oven are fully preheated.
Also give the loaf enough uncovered baking time to develop color.
Why is my crust too thick?
Your particular oven may be running hotter than expected, or the loaf may simply have stayed in the oven too long.
Watch the crust carefully after removing the lid.
Why did my dough stick to the banneton?
Usually the basket wasn’t dusted sufficiently, or the dough was particularly wet.
A good coating of rice flour can make a noticeable difference.
How I Store Homemade Sourdough
Once the bread has cooled completely, store it at room temperature.
A bread bag, paper bag, or bread box works well.
I wouldn’t seal freshly baked bread in an airtight plastic bag while it’s still warm. Trapped moisture can soften the crust.
If you’re not going to eat the entire loaf within a few days, freezing is a better option.
Slice the bread first, place the slices in a freezer-safe bag, and freeze them.
Then you can remove individual slices whenever you need them and warm them in a toaster or oven.
What to Serve With Sourdough Bread
There are plenty of ways to use a fresh sourdough loaf.
Some of my favorites are:
- Butter with a little sea salt
- Fried or scrambled eggs
- Avocado toast
- Cream cheese
- Homemade soup
- Grilled cheese
- Sandwiches
- Jam
- Honey
- Olive oil and herbs
Older slices are also useful.
Toast them and serve with breakfast, or cut them into cubes and turn them into homemade croutons.
A Few Things That Make the Next Loaf Easier
After making sourdough a few times, you’ll start noticing patterns.
For example, if your dough consistently takes much longer to ferment, your kitchen may simply be cooler.
If your dough regularly spreads during shaping, you may need to look more closely at fermentation and dough strength.
I also recommend writing down a few details after each bake:
- Room temperature
- Starter feeding time
- How long the starter took to peak
- Bulk fermentation time
- Cold-proof duration
- Baking temperature
- Final result
You don’t need a complicated spreadsheet. A few notes on your phone are enough.
After several loaves, those notes become surprisingly useful.
You’ll start knowing what your starter normally does and how your dough behaves in different weather.
Final Thoughts
A good sourdough loaf isn’t really about rushing through a recipe. It’s about learning what the dough is telling you.
The first few attempts may not look like the perfect bakery loaf you had in mind. That’s normal. One loaf might spread a little, another might develop a darker crust, and sometimes the crumb won’t have the exact holes you expected.
That’s part of learning sourdough.
Start with an active starter, use a kitchen scale, don’t drown the dough in extra flour, give fermentation enough time, and make sure your Dutch oven is properly heated.
Once you get familiar with those basics, making an overnight sourdough loaf becomes much less intimidating.
And honestly, there is something very satisfying about taking a cold, risen piece of dough from the refrigerator in the morning, scoring it, and watching it turn into a crackly homemade loaf in the oven.
