
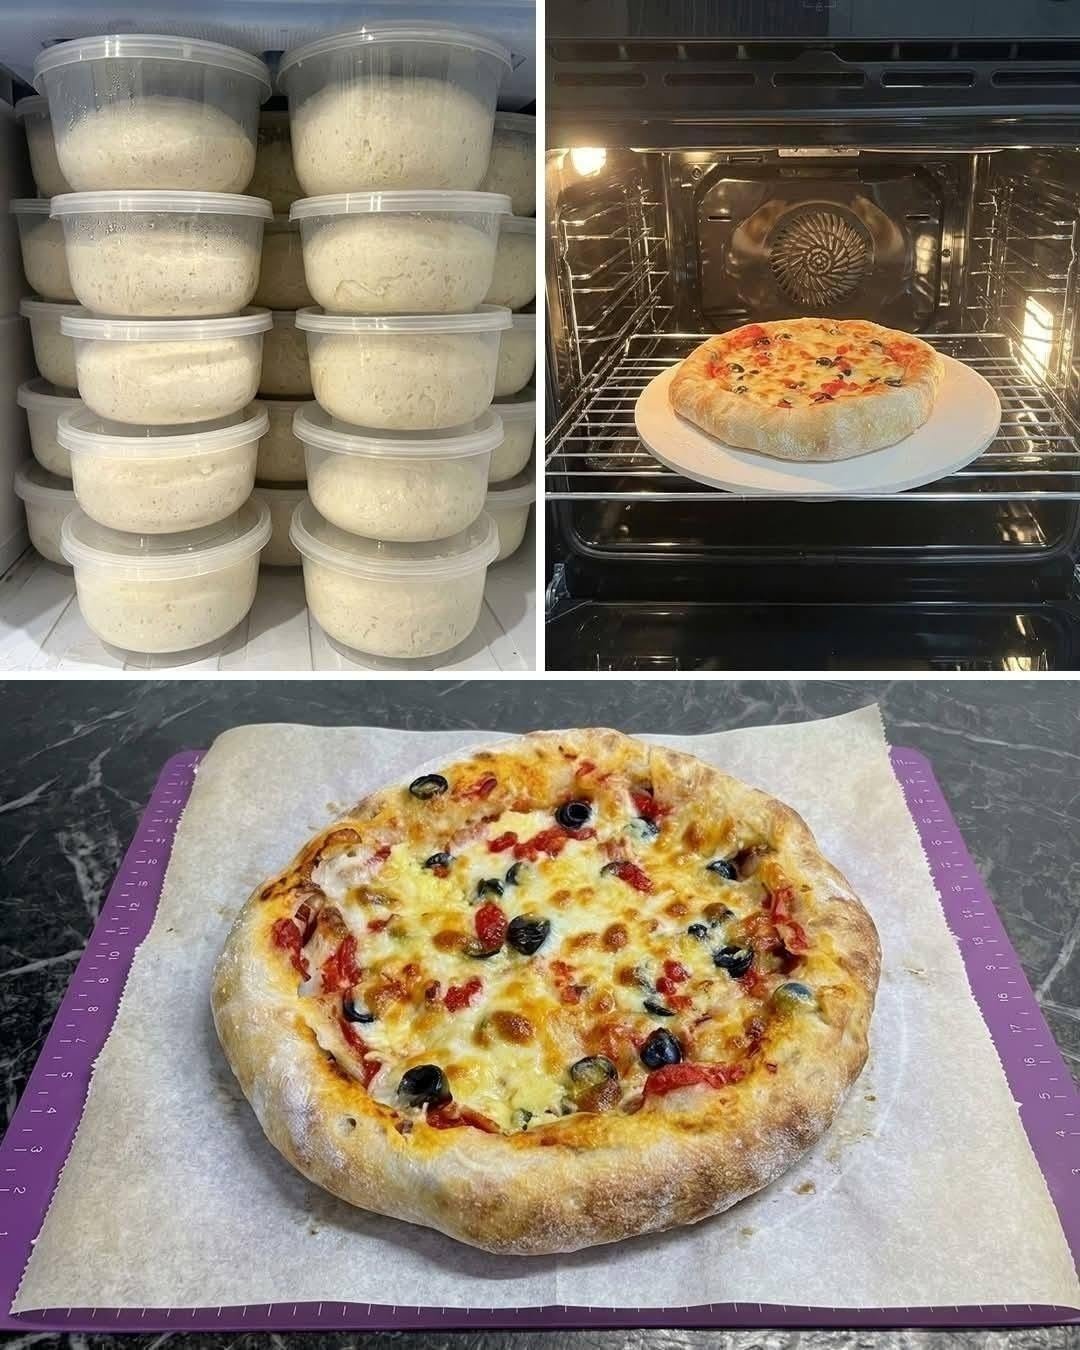
I used to keep a small jar of sourdough discard in the refrigerator and tell myself I would use it later. Then “later” would arrive, the jar would get pushed to the back of the fridge, and I would wonder what I was supposed to do with all of it.
Pizza turned out to be one of the easiest answers.
This sourdough discard pizza crust has become one of those recipes I make when I want homemade pizza without planning an entire day around it. The dough is simple, the ingredients are basic, and you can bake it the same day or give it an overnight rest for more flavor.
The first few times I made it, I made the classic mistake of adding too much flour. The dough felt sticky, so I kept dusting the counter and my hands with flour. The pizza was edible, but the crust was noticeably heavier than I wanted.
Once I learned to leave the dough slightly soft, everything changed.
The finished crust has lightly crisp edges, a soft and chewy center, and just enough sourdough tang to make it taste different from ordinary homemade pizza dough.
And you can load it with whatever you already have in the refrigerator.
Why Use Sourdough Discard for Pizza?
If you maintain a sourdough starter, you probably know that discard can pile up quickly.
Instead of throwing it away, pizza dough gives it another job.
Sourdough discard adds flavor and can contribute to the texture of the dough. The exact flavor depends on how old your discard is and how your starter is maintained.
One important thing to remember, though, is that discard is not necessarily strong enough to raise a pizza dough on its own.
That’s why this recipe includes optional instant yeast.
If you want a more predictable same-day rise, use the yeast. If you are comfortable giving the dough more time, you can experiment with a longer fermentation using your sourdough starter.
Ingredients
For the Pizza Dough
You will need:
- 1 cup (240g) sourdough discard
- 1½ cups (190g) all-purpose flour
- ¾ cup warm water
- 1 tablespoon olive oil
- 1 teaspoon salt
- 1 teaspoon sugar
- 1 teaspoon instant yeast, optional
- Extra flour or cornmeal for shaping
For Topping
The fun part is choosing the toppings.
Some easy options include:
- Pizza sauce
- Mozzarella cheese
- Cheddar cheese
- Pepperoni
- Cooked chicken
- Mushrooms
- Bell peppers
- Red onion
- Olives
- Fresh basil
- Oregano
- Red pepper flakes
You don’t need to use everything on the list. In fact, keeping the toppings simple usually produces a better crust.
Before You Start: What Kind of Discard Should You Use?
You don’t need perfectly bubbly, freshly fed starter for this recipe.
Sourdough discard that has been stored in the refrigerator can work well.
However, I prefer using discard that still looks and smells normal for a healthy sourdough starter. If it has been sitting around for a very long time and has developed an unpleasant smell, mold, or other signs of spoilage, don’t use it.
For the best texture, give refrigerated discard a good stir before measuring it.
And if your discard is particularly thick or runny, don’t be surprised if your dough needs a small adjustment in flour or water.
Step 1: Mix the Dough
Add the sourdough discard, warm water, and olive oil to a large mixing bowl.
Stir until they are reasonably well combined.
Add the sugar and salt. If you’re using instant yeast, add it now as well.
Start adding the flour gradually while stirring.
I find a sturdy wooden spoon or silicone spatula works well at this stage.
The dough will eventually become too thick to stir comfortably, and that’s your signal to switch to your hands if necessary.
The goal isn’t a perfectly smooth dough yet.
You simply want all the ingredients incorporated and no large pockets of dry flour remaining.
What Should the Dough Feel Like?
The dough should feel soft and slightly sticky.
It shouldn’t be so wet that it spreads like batter, but it also shouldn’t feel like a stiff ball of bread dough.
This is where I used to add too much flour.
Don’t worry if a little dough sticks to your fingers.
Instead of adding a large amount of flour, lightly oil or flour your hands and continue working with it.
Step 2: Knead the Dough
Transfer the dough to a lightly floured work surface.
Knead for approximately 8 to 10 minutes.
You don’t need to attack the dough or knead it aggressively. Use a steady rhythm: push the dough away from you, fold it back, turn it, and repeat.
After several minutes, you should notice a difference.
The dough should become smoother and more elastic.
If you’re using a stand mixer, attach the dough hook and mix until the dough comes together and feels soft and elastic.
But honestly, you don’t need a mixer for this recipe.
A bowl and your hands are perfectly adequate.
Don’t Keep Adding Flour While Kneading
This deserves repeating because it is one of the easiest ways to end up with a dense crust.
If the dough sticks slightly, use a small amount of flour.
Don’t keep adding handful after handful.
A softer dough generally gives you a more pleasant pizza crust.
Step 3: Let the Dough Rise
Lightly oil a clean bowl.
Place the dough inside and turn it once so the outside gets a light coating of oil.
Cover the bowl with plastic wrap, a lid, or a clean kitchen towel.
Leave it in a warm area for about 1 to 2 hours, or until it looks puffy and has increased in size.
The exact timing will depend on the temperature of your kitchen and whether you used instant yeast.
A warm kitchen can speed things up, while a cool room can slow the process down.
Don’t worry if your dough doesn’t exactly double. Look for visible puffiness and expansion.
Want More Sourdough Flavor?
You can put the covered dough in the refrigerator overnight.
A longer, cooler rest allows the flavors to develop more gradually.
When you’re ready to make the pizza, take the dough out and let it sit at room temperature for approximately 30 to 60 minutes before shaping.
If you’re skipping the instant yeast, expect the dough to need more time. Sourdough discard that isn’t actively fermenting may not provide enough lifting power for a quick rise.
Step 4: Get Your Oven Really Hot
This is one of the most important parts of homemade pizza.
Set your oven to:
475°F (245°C)
If you have a pizza stone or baking steel, put it in the oven while it preheats.
Give it at least 30 minutes to heat properly.
If you don’t own a pizza stone or steel, don’t worry.
A heavy baking sheet works.
Place the baking sheet in the oven while it preheats so the metal becomes hot.
A hot surface helps the bottom of the dough cook quickly, which is what you’re looking for when you want a crisp base without drying out the entire crust.
A Note About Home Ovens
Home ovens usually don’t reach the extremely high temperatures used by some professional pizza ovens.
That’s why preheating the baking surface is so useful.
The hotter the surface, the better your chances of getting a nicely browned bottom.
Step 5: Shape the Pizza Dough
Once the dough is ready, turn it onto a lightly floured surface.
Gently shape it into a ball.
If it immediately starts shrinking when you stretch it, don’t fight it.
Let it rest for 5 to 10 minutes.
The gluten needs a little time to relax.
After the short rest, try again.
Use your fingertips to gently press the dough outward.
Leave a slightly thicker border around the edge.
For a thin, crispy pizza, stretch the center more.
For a softer and chewier crust, leave the dough slightly thicker.
Don’t worry if your pizza isn’t perfectly round.
A rustic oval pizza tastes just as good.
Step 6: Add the Sauce and Toppings
Transfer the shaped dough to parchment paper or a lightly floured pizza peel.
Brush the surface lightly with olive oil if you like.
Spread a thin layer of pizza sauce over the dough.
Leave a small border around the edge.
Then add your cheese and toppings.
This is another place where I learned something through trial and error: more toppings don’t necessarily mean a better pizza.
It is tempting to cover every inch with sauce, cheese, meat, and vegetables.
But too much topping adds weight and moisture to the center.
The result can be a pizza with a perfectly browned edge and a soggy middle.
A moderate layer of sauce and cheese usually works better.
My Favorite Simple Combination
When I don’t want to think too much about toppings, I use:
- Pizza sauce
- Mozzarella
- Oregano
- Fresh basil
- A small drizzle of olive oil
It’s simple, but the sourdough flavor has room to come through.
Step 7: Bake the Pizza
Carefully transfer the pizza to the hot baking surface.
Bake for approximately 12 to 15 minutes.
The exact time depends on your oven, the thickness of your dough, and how many toppings you’ve added.
Look for:
- Golden-brown crust edges
- Melted and bubbling cheese
- A cooked-looking center
- A browned bottom
If you want additional browning on top, switch to the broiler for the final 1 to 2 minutes.
Watch it constantly during this stage.
Cheese can go from beautifully browned to burnt surprisingly quickly under a broiler.
Step 8: Let It Rest Before Slicing
Once the pizza comes out of the oven, give it about 2 to 3 minutes before slicing.
I know it’s tempting to cut immediately.
But allowing the cheese and crust to settle for a couple of minutes makes the pizza easier to handle.
Add fresh basil, oregano, red pepper flakes, or a drizzle of olive oil.
Then slice and serve.
Easy Sourdough Discard Pizza Topping Ideas
Classic Cheese
Keep it simple with pizza sauce, mozzarella, oregano, and fresh basil.
This is also a good option when you want to taste the crust itself.
Chicken and Vegetable
Use cooked chicken, mozzarella, red onion, and bell peppers.
Make sure the chicken is already cooked before putting it on the pizza.
Vegetable Pizza
Try mushrooms, bell peppers, onions, olives, spinach, and mozzarella.
Don’t pile the vegetables too high. Mushrooms and some other vegetables release moisture as they cook.
Spicy Pepperoni
Add pepperoni, mozzarella, jalapeños, oregano, and red pepper flakes.
If you like heat, you can add a little chili oil after baking.
Garlic Herb
Before baking, brush the crust lightly with olive oil mixed with garlic powder and Italian herbs.
This works especially well if you like a strongly seasoned pizza edge.
Common Problems and How to Fix Them
The Dough Is Too Sticky
First, give it a few minutes of kneading.
Sometimes dough feels extremely sticky at the beginning but becomes easier to handle as the flour hydrates and gluten develops.
If it is still excessively wet, add flour one tablespoon at a time.
Don’t dump in a large amount all at once.
The Dough Feels Too Dry
Add a small splash of water and work it in.
The exact moisture level can vary depending on the flour and your sourdough discard.
The Dough Keeps Shrinking
This usually means the dough needs a little more time to relax.
Cover it and let it rest for 5 to 10 minutes before stretching again.
Trying to force it usually makes the problem worse.
The Bottom Is Pale
Your baking surface may not have been hot enough.
Make sure your pizza stone, steel, or baking sheet has been preheating for at least 30 minutes.
Also make sure you’re baking at the full temperature.
The Center Is Soggy
Check your toppings first.
Too much sauce, cheese, meat, or watery vegetables can make the center difficult to crisp.
Try using less topping and spreading the sauce more thinly.
The Crust Is Too Hard
You may have added too much flour or baked the pizza for too long.
A softer dough and slightly shorter baking time can help.
Can You Make This Dough Ahead?
Yes, and this is one of the things I like most about this recipe.
After kneading, place the dough in a lightly oiled container and cover it well.
Refrigerate for up to about 2 days.
When you’re ready to make pizza, take it out and allow it to sit at room temperature for roughly 30 to 60 minutes.
Then shape, top, and bake.
The refrigerator is especially useful when you know you’ll be busy the next day.
You can prepare the dough ahead of time instead of trying to make everything right before dinner.
Can You Freeze Sourdough Pizza Dough?
Yes.
Wrap the dough tightly and place it in a freezer-safe container or bag.
It can be frozen for up to about 2 months for best quality.
When you want to use it, thaw it in the refrigerator overnight.
Then allow it to sit at room temperature before shaping.
The dough may feel slightly different after freezing, but it can still make a very good homemade pizza.
How to Store Leftover Pizza
If you somehow have leftovers, let the pizza cool before storing it.
Place the slices in an airtight container and refrigerate for up to 3 days.
For reheating, I prefer an oven, skillet, or air fryer.
An air fryer is particularly convenient for a couple of slices because it can bring back some of the crispness without heating the entire kitchen.
The microwave works when you’re in a hurry, but the crust usually becomes softer.
If you want the original crispy texture, dry heat is the better choice.
A Few Things I Would Do Differently Next Time
After making homemade pizza several times, there are a few small lessons I keep coming back to.
Don’t rush the dough. If it needs another 15 or 20 minutes to become easier to handle, give it that time.
Don’t overload the pizza. A thin layer of sauce and a reasonable amount of cheese usually produces a better result than a mountain of toppings.
Heat the baking surface properly. This is one of the biggest differences between a soft homemade pizza and one with a crisp bottom.
Keep the dough soft. A little stickiness isn’t a problem.
Give yourself enough workspace. Shaping pizza is much easier when you aren’t trying to work on a tiny cutting board.
And finally, don’t worry about making a perfect circle. Homemade pizza is supposed to have a little personality.
Simple Same-Day Schedule
If you want pizza for dinner, you can roughly follow this schedule:
2:00 PM: Mix the dough.
2:10 PM: Knead for 8–10 minutes.
2:20 PM: Cover and let rise.
4:00 PM: Check the dough and shape when ready.
4:10 PM: Preheat the oven and baking surface if you haven’t already.
5:00 PM: Shape and top the pizza.
5:15 PM: Bake.
5:30 PM: Let it rest briefly, slice, and serve.
Your actual timing may vary depending on the temperature of your kitchen and how quickly your dough rises, so use the appearance of the dough as your guide.
Recipe Notes
Prep Time: 15 minutes
Kneading: 8–10 minutes
Rise Time: 1–2 hours
Bake Time: 12–15 minutes
Total Time: About 2½ hours
Yield: 1 large pizza or 2 smaller pizzas
Oven Temperature: 475°F (245°C)
Nutrition will depend heavily on the toppings you choose. The crust itself also varies depending on the exact flour, sourdough discard, olive oil, and portion size, so nutrition information is best calculated from the specific ingredients you use.
Final Thoughts
There is something satisfying about turning a container of sourdough discard into a pizza instead of throwing it away.
The dough doesn’t require complicated equipment, and you don’t need to be an experienced bread baker to get started.
The biggest lesson is simply to avoid fighting the dough.
Keep it soft, give it enough time to rise, let it relax before stretching, and make sure your baking surface is properly heated.
From there, the toppings are completely up to you.
Some nights it might be a simple cheese pizza. Other times, leftover chicken, vegetables, olives, or whatever happens to be in the refrigerator can become dinner.
Once you get comfortable with the dough, sourdough discard pizza becomes less of a recipe you have to follow and more of a reliable homemade pizza method you can return to whenever that jar of discard starts filling up again.
