
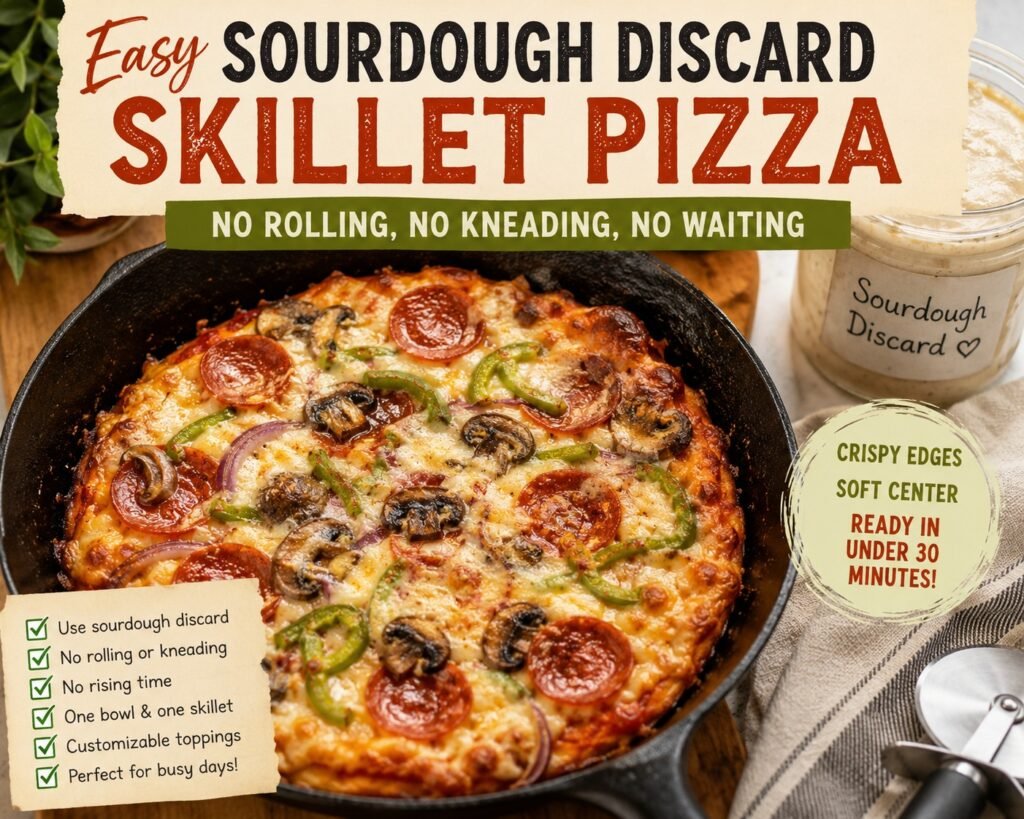
I still remember staring at a jar of sourdough discard in my refrigerator and thinking, “I really don’t want to make another loaf of bread today.” I had already baked twice that week, and the idea of mixing dough, kneading it, waiting hours for it to rise, and then shaping it just wasn’t happening.
I almost threw the discard away.
Instead, I tried something that honestly sounded too simple to work. I poured the discard straight into a screaming-hot cast-iron skillet, crossed my fingers, and hoped for the best.
A few minutes later, the kitchen smelled like fresh pizza. The edges were crispy, the bottom was beautifully golden, and somehow that loose sourdough discard had transformed into a sturdy pizza crust.
Since then, this has become one of my favorite ways to use leftover sourdough starter. Whenever I have discard piling up, this skillet pizza is usually the first thing I make.
Why This Recipe Is So Different
Traditional pizza dough is all about patience.
You knead it, let it ferment, shape it carefully, and then bake it.
This recipe skips almost every one of those steps.
Instead of building structure through gluten development and long fermentation, the hot cast-iron skillet does most of the work.
The instant the room-temperature discard hits the hot oil, it begins cooking from the bottom up. That quick blast of heat creates:
- Crispy golden edges
- A firm base that holds toppings
- A soft, slightly chewy center
- No rolling pin required
The finished crust isn’t identical to a traditional New York pizza.
It reminds me more of a cross between focaccia, pan pizza, and a crispy flatbread—and honestly, that’s part of its charm.
What Kind of Sourdough Discard Works Best?
One thing I learned after making this recipe several times is that not all discard behaves exactly the same.
Room-temperature discard gives better results
The very first time I tried this recipe, I poured discard straight from the refrigerator into the hot skillet.
The crust still worked, but the bottom wasn’t nearly as crisp.
Now I simply measure out the discard and let it sit on the counter for about 30 to 60 minutes while the oven heats.
That small step makes a surprisingly big difference.
Thick discard creates a stronger crust
Your discard should look similar to thick pancake batter.
If it’s extremely runny, the crust may stay softer in the middle and need a few extra minutes of baking.
Older discard tastes tangier
Discard that’s been sitting in the refrigerator for several days develops a stronger sourdough flavor.
Personally, I love that extra tang when I’m making pepperoni pizza or anything with sausage.
If you prefer a milder crust, fresher discard works better.
Of course, never use discard with mold, pink or orange streaks, or an unpleasant rotten smell.
Ingredients You’ll Need
For the crust
- 1 cup sourdough discard (about 225–240g)
- 1 tablespoon avocado oil, divided
- ¼ teaspoon salt
- ½ teaspoon Italian seasoning
- ¼ teaspoon garlic powder (optional)
For the toppings
- ⅓ cup pizza sauce
- 1–1½ cups shredded low-moisture mozzarella
- Pepperoni or your favorite toppings
- Parmesan cheese (optional)
- Dried oregano
- Red pepper flakes
I usually keep the toppings fairly simple because heavy toppings can make the center softer.
Why Cast Iron Makes Such a Big Difference
I’ve tested this recipe in several pans.
Cast iron wins every single time.
Its biggest advantage is heat retention.
Unlike lightweight baking trays, cast iron stays extremely hot even after the cool discard is added. That instant heat creates the crisp bottom everyone wants.
A heavy stainless-steel skillet can work, and carbon steel also performs well.
Glass baking dishes, however, aren’t ideal for this recipe because they don’t produce the same crispy crust and can be damaged by sudden temperature changes.
Step-by-Step Instructions
Step 1: Bring the discard to room temperature
Measure one cup of discard and let it rest on the counter while the oven preheats.
This helps the skillet stay hot enough to immediately start forming the crust.
Step 2: Preheat the skillet
Place an empty 10-inch cast-iron skillet inside the oven.
Preheat the oven to 450°F (232°C).
Even after the oven reaches temperature, leave the skillet inside for another 20 minutes.
This is probably the single most important step in the recipe.
Step 3: Prepare your toppings
While waiting, shred the cheese and prepare everything you’ll need.
If you’re using:
- Mushrooms
- Spinach
- Peppers
- Sausage
- Chicken
Cook them first.
Raw vegetables release moisture that can make the crust soggy.
Step 4: Oil and season the skillet
Using thick oven mitts, carefully remove the hot skillet.
Add about two teaspoons of avocado oil.
Tilt the pan so the oil coats the entire bottom.
Sprinkle in:
- Salt
- Italian seasoning
- Garlic powder
Work carefully because the oil moves quickly in the hot pan.
Step 5: Pour in the discard
Pour the discard directly into the center.
You’ll hear an immediate sizzle.
That’s exactly what you want.
Use the back of a spoon only if necessary to gently spread the discard toward the edges.
Don’t overwork it.
Finish by drizzling the remaining teaspoon of oil around the edge.
Step 6: Bake the crust first
Bake the plain crust for 10–12 minutes.
The top should no longer look wet.
Some large bubbles may appear.
Don’t panic—they’re completely normal.
If one bubble becomes enormous, gently press it down before adding toppings.
Step 7: Add toppings
Spread a thin layer of sauce.
Add mozzarella.
Finish with your favorite toppings.
Avoid piling cheese against the sides of the skillet because it can burn before the pizza finishes cooking.
Step 8: Bake again
Return the pizza to the oven for another 8–10 minutes.
If you like darker cheese, switch the oven to broil for the final minute.
Watch it constantly.
Cheese can go from perfectly browned to burned surprisingly fast.
Step 9: Let it rest
This is another mistake I learned the hard way.
The first time I made this pizza, I sliced it immediately.
The cheese slid everywhere.
Now I let it rest for about five minutes.
The cheese settles, and the crust becomes even crispier.
My Favorite Topping Combinations
I’ve experimented with quite a few versions, and these are the ones I keep making.
Classic Pepperoni
- Pizza sauce
- Mozzarella
- Pepperoni
- Parmesan
Simple, crispy, and always satisfying.
Garlic Cheese Pizza
- Garlic powder
- Mozzarella
- Parmesan
- Oregano
Perfect when you don’t have many ingredients.
Sausage and Peppers
Cook both before adding them.
This combination pairs beautifully with the slightly tangy sourdough flavor.
Margherita Style
- Light tomato sauce
- Mozzarella
- Fresh tomatoes
- Basil added after baking
Pat the tomatoes dry first.
White Pizza
Skip the tomato sauce completely.
Use ricotta, mozzarella, Parmesan, garlic, and herbs.
Just don’t overload the ricotta.
A little goes a long way.
Tips for an Extra Crispy Crust
After making this recipe many times, these small details consistently make the biggest difference.
- Always fully preheat the skillet.
- Let discard warm slightly before using it.
- Use enough oil to coat the pan.
- Bake the crust before adding toppings.
- Don’t overload the pizza with sauce.
- Choose low-moisture mozzarella.
- Allow the finished pizza to rest before slicing.
Each one seems minor, but together they produce a much better crust.
Common Problems (And How I Fixed Them)
The crust stuck to the skillet
Usually this happens because the skillet wasn’t hot enough or didn’t have enough oil.
A well-seasoned cast-iron skillet releases the crust much more easily.
The middle stayed soft
This happened to me when I spread the discard too thick.
Either use slightly less discard or extend the first bake by a few minutes.
The bottom burned
Every oven behaves differently.
If yours runs hot, bake at 425°F instead of 450°F or move the skillet to the center rack.
The pizza tasted too sour
Older discard naturally has a stronger flavor.
Using fresher discard creates a milder crust.
The cheese browned too quickly
Next time, bake the crust longer before adding toppings.
If needed, loosely cover the pizza with foil during the second bake.
Easy Variations
Once you understand the basic technique, it’s easy to change the flavors.
Some fun ideas include:
- Garlic herb crust
- Buffalo chicken pizza
- Breakfast pizza with eggs and sausage
- Pesto vegetable pizza
- BBQ chicken pizza
- Mini personal skillet pizzas
This recipe is surprisingly flexible.
Storing Leftovers
Allow the pizza to cool completely.
Store slices in an airtight container in the refrigerator for up to three days.
If stacking slices, place parchment paper between them.
The pizza also freezes well for up to two months.
Best Ways to Reheat
I’ve tested several methods.
The microwave is the quickest, but it’s my least favorite because it softens the crust.
Instead, try one of these:
Oven: 375°F for 6–10 minutes
Air Fryer: 350°F for 3–5 minutes
Skillet: Medium-low heat with a lid for a few minutes
The skillet method is actually my favorite because it restores that wonderfully crispy bottom.
Frequently Asked Questions
Does the discard need to be active?
No.
This recipe works with regular unfed sourdough discard.
The structure comes from the hot skillet rather than fermentation.
Can I use whole-wheat discard?
Absolutely.
Whole-wheat discard creates a heartier flavor and a slightly denser crust.
Which temperature is better: 425°F or 450°F?
Both work well.
I usually bake at 450°F because I love the darker, crispier edges.
If your oven runs hot or you prefer a softer crust, 425°F is a great option.
Can I use olive oil?
Yes.
Extra virgin olive oil works well, especially at 425°F.
For higher temperatures, avocado oil is a safer choice because of its higher smoke point.
Final Thoughts
This skillet pizza completely changed the way I look at sourdough discard. Instead of seeing it as something I needed to use up before feeding my starter again, I started treating it like a shortcut to an easy homemade meal.
What I enjoy most is how forgiving it is. There’s no kneading, no shaping, and no worrying about perfect dough handling. As long as your skillet is properly preheated and you don’t overload the toppings, you’ll end up with a crisp, golden crust that’s ready in far less time than traditional pizza dough.
Now, whenever I have extra discard sitting in the fridge, I don’t think about wasting it—I think about pizza night.