There was a time when I wouldn’t even think about making sourdough without following every “essential” step I’d learned from books, YouTube videos, and experienced bakers. If a recipe said to autolyse for an hour, I did it. If someone claimed it improved gluten development, I never questioned it.
Then one busy afternoon, I looked at the clock and thought, “Do I really need to do this every single time?”
That simple question led to one of the most interesting baking experiments I’ve tried in a long time.
Instead of mixing only flour and water first, I mixed the flour, water, and my active sourdough starter together immediately. The only ingredient I held back was the salt. After a short 30-minute rest, I worked the salt into the dough and continued baking exactly as I normally would.
I expected at least some noticeable difference.
Maybe weaker dough.
Maybe less oven spring.
Maybe a tighter crumb.
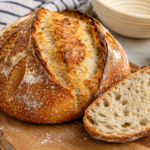
Instead, the loaf turned out surprisingly good.
That bake completely changed how I think about autolyse.
Why I Decided to Skip Autolyse
If you’ve been baking sourdough for a while, you know how many steps are involved.
You feed the starter.
Wait.
Mix the dough.
Wait.
Stretch and fold.
Wait.
Bulk ferment.
Wait.
Shape.
Proof.
Bake.
Cool.
Wait again before slicing.
It’s rewarding, but it also takes time.
Autolyse isn’t difficult, but it still means mixing the dough once, leaving it alone, then coming back later to continue.
One day I realized I wasn’t doing it because I understood exactly why—I was doing it simply because every recipe told me to.
That made me curious.
Would my bread actually suffer if I skipped the traditional autolyse?
There was only one way to find out.
What Is Autolyse?
For anyone new to sourdough, autolyse is a resting period where you mix only the flour and water before adding the sourdough starter and salt.
During this rest:
- The flour absorbs water.
- Gluten begins developing naturally.
- The dough becomes smoother.
- Mixing later usually requires less effort.
Many bakers swear by it, especially when using high-hydration doughs or strong bread flour.
It’s a proven technique.
But “helpful” doesn’t necessarily mean “required.”
That was exactly what I wanted to test.
The Small Change I Made
Rather than mixing flour and water first, I changed only one part of the process.
Here’s what I did.
I combined:
- Bread flour
- Water
- Active sourdough starter
I mixed everything until there wasn’t any dry flour left.
The dough looked rough and shaggy, exactly like many freshly mixed sourdough doughs do.
I covered the bowl and let it rest for 30 minutes.
Only after that short rest did I add the salt.
Everything else stayed exactly the same.
Same flour.
Same hydration.
Same starter.
Same folding schedule.
Same fermentation.
Same baking method.
Changing only one variable makes it much easier to understand what actually affects the final loaf.
Mixing in the Salt
After thirty minutes, I sprinkled the salt over the dough.
At first, it felt awkward.
The dough became slippery while I pinched and folded the salt into it.
That’s completely normal.
Within a few minutes the dough came back together and felt smooth again.
Using slightly damp hands made this much easier.
After the salt was fully incorporated, I moved straight into my regular stretch-and-fold routine.
What Happened During Bulk Fermentation
This is where I expected problems.
If skipping autolyse really mattered, I assumed the dough would feel weaker during folding.
Instead, it behaved almost exactly like my usual dough.
Each round of stretch and folds made the dough stronger.
It became smoother.
It tightened nicely.
It started holding its shape better after every fold.
By the end of bulk fermentation, the dough had expanded well and felt airy without becoming sticky or difficult to handle.
Nothing suggested I had skipped an important step.
That was my first clue that this experiment might actually work.
Shaping Was Easier Than Expected
One concern I had was shaping.
Weak dough usually spreads across the counter and refuses to hold tension.
That didn’t happen.
The dough shaped beautifully.
It created surface tension without tearing.
It held its round shape inside the banneton.
If someone had handed me the dough without telling me how it was mixed, I honestly wouldn’t have guessed anything was different.
The Final Bake
The real test came when the loaf went into the oven.
Every sourdough baker knows that moment.
You remove the lid from the Dutch oven and hope the bread has risen well.
Mine did.
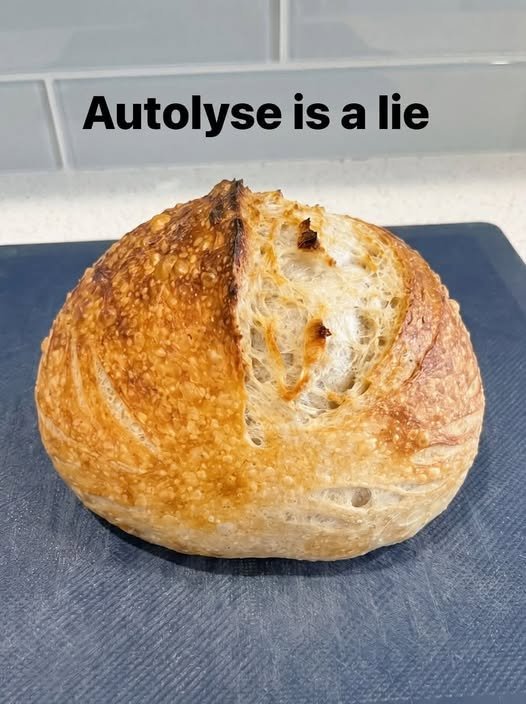
The oven spring looked excellent.
The crust developed a rich golden-brown color with plenty of blistering.
The scoring opened nicely.
Once the loaf cooled, I sliced it open.
The crumb was soft, open, and evenly fermented.
Exactly what I hoped for.
Not perfect—no loaf ever is—but certainly good enough that I would happily repeat the process.
Did Skipping Autolyse Change the Flavor?
Honestly, not in any noticeable way.
The bread still had:
- Mild sourness
- Sweet wheat flavor
- Chewy texture
- Crisp crust
- Moist interior
If someone had served me this loaf beside one made with a traditional autolyse, I’m not sure I could consistently tell which was which.
That surprised me the most.
Why This Method Still Works
Even without a traditional autolyse, the dough still received a resting period.
That thirty-minute pause gave the flour time to absorb water while fermentation had already begun because the starter was present.
The dough still hydrated.
Gluten still developed.
The salt simply joined the process a little later.
It wasn’t skipping rest entirely.
It was simply changing the order.
Is Autolyse Really Necessary?
After this bake, my answer became much more balanced.
Sometimes yes.
Sometimes no.
Autolyse definitely has benefits.
It can make dough easier to mix.
It often improves extensibility.
It may reduce mixing effort.
It can be especially useful with very strong flour or extremely wet doughs.
But my experience showed that it’s not automatically essential for every loaf.
Sometimes we continue doing something because it became part of our routine.
Testing those routines occasionally teaches us what truly matters.
When I Would Still Use Autolyse
Even after this successful experiment, I haven’t abandoned autolyse completely.
I’d still use it when:
- Working with whole wheat flour.
- Making very high-hydration dough.
- Using particularly strong bread flour.
- Mixing entirely by hand.
- Trying a brand-new flour.
In those situations, the extra hydration time can genuinely improve dough handling.
When I’d Skip It Again
I’ll probably skip the traditional autolyse when:
- I’m baking a standard country loaf.
- I’m using familiar flour.
- My starter is strong and active.
- I’m short on time.
- I simply want a slightly simpler baking session.
Knowing I can save a step without sacrificing quality makes baking feel less intimidating.
Step-by-Step No-Autolyse Method
If you’d like to try the same approach, here’s exactly what worked for me.
Step 1
Add flour, water, and active sourdough starter to a large bowl.
Step 2
Mix until no dry flour remains.
Don’t worry if the dough looks rough.
Step 3
Cover the bowl.
Rest for 30 minutes.
Step 4
Sprinkle the salt over the dough.
Use damp hands to pinch and fold until fully incorporated.
Step 5
Perform your normal stretch-and-fold or coil-fold schedule.
Step 6
Bulk ferment until the dough becomes airy and noticeably expanded.
Step 7
Shape the dough.
Place it into a floured banneton or proofing basket.
Step 8
Proof according to your usual schedule.
Step 9
Bake in your preferred Dutch oven or covered baking vessel.
Step 10
Allow the loaf to cool completely before slicing.
Mistakes to Avoid
While this method worked well for me, a few things still matter.
Don’t use a weak starter.
A sluggish starter causes far more problems than skipping autolyse ever will.
Don’t rush fermentation.
The dough still needs enough time to ferment properly.
Don’t panic if the dough looks rough.
Freshly mixed dough almost always looks messy.
Give it time.
Don’t change everything at once.
If you’re testing this method, keep everything else exactly the same.
Otherwise, you won’t know what caused any differences.
Don’t rely only on the clock.
Temperature changes everything in sourdough.
Watch the dough.
Not just the timer.
Lessons I Learned
This experiment reminded me that sourdough isn’t nearly as fragile as many of us imagine.
There are certainly important principles.
Good fermentation matters.
A healthy starter matters.
Proper shaping matters.
But some individual steps are more flexible than we often believe.
The biggest lesson wasn’t that autolyse is unnecessary.
It was that testing small changes teaches far more than blindly following every rule.
Every kitchen is different.
Every flour behaves differently.
The only way to know what works for your setup is to experiment carefully.
Would I Recommend Trying It?
Absolutely.
Especially if you’ve already baked a few successful sourdough loaves and want to simplify your routine.
Don’t think of this as replacing autolyse forever.
Think of it as another tool you can use when it suits your schedule.
Some days you’ll want the traditional process.
Other days you’ll appreciate saving a little time without sacrificing the quality of your bread.
That’s exactly what happened in my kitchen.
Final Thoughts
Skipping the traditional autolyse didn’t ruin my bread.
It didn’t produce a flat loaf.
It didn’t create weak dough.
Instead, I ended up with a loaf that had great oven spring, a crisp crust, and an airy crumb that my family happily finished within a day.
That doesn’t mean autolyse has no value. It absolutely does, and many experienced bakers will continue using it for good reasons.
But this experiment reminded me that sourdough baking isn’t about memorizing rules—it’s about understanding your dough.
Sometimes the best improvements come from questioning habits you’ve followed for years.
If you’ve always treated autolyse as a step you could never skip, try this method on a loaf you know well. Keep everything else the same, pay attention to how the dough feels, and compare the results for yourself.
You might discover, just as I did, that your bread turns out every bit as satisfying—with one less step in the process.