
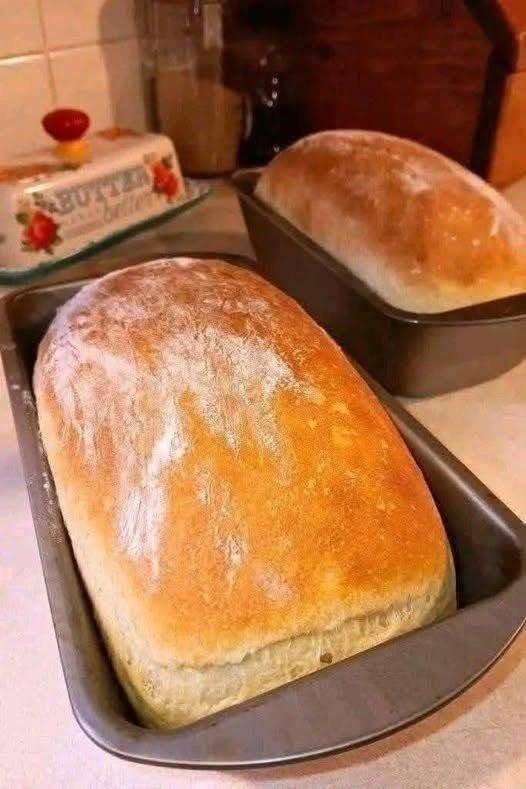
There is something special about slicing into a fresh loaf of homemade sourdough bread. The crust makes a gentle crackling sound, the inside feels soft and slightly chewy, and the mild tangy flavor makes even a simple slice with butter taste wonderful.
But sourdough baking can be a little frustrating when you are starting out. Sometimes the dough barely rises, sometimes the loaf spreads across the baking surface, and sometimes the crust looks perfect while the inside remains gummy. These problems are common, especially when you are still learning how your sourdough starter behaves.
This homemade sourdough bread loaf recipe is designed to make the process easier to understand. It uses a simple combination of bread flour, whole wheat flour, water, salt, and an active sourdough starter. You do not need a stand mixer, and most of the preparation involves resting and folding the dough rather than continuous kneading.
A Dutch oven helps create the steam needed for a crisp crust and a good rise. The overnight refrigerator rest also gives the dough time to develop flavor, making it convenient to bake a fresh loaf the following morning.
Sourdough Bread Loaf Recipe at a Glance
- Yield: 1 medium artisan loaf
- Active preparation time: Approximately 30 minutes
- Bulk fermentation: About 4–6 hours, depending on temperature
- Cold proof: 12–16 hours
- Baking time: 45–50 minutes
- Total time: Approximately 13–17 hours or longer, depending on fermentation
- Difficulty: Intermediate
- Baking temperature: 475°F (245°C), then 450°F (230°C)
The actual timing can vary with room temperature and starter strength. If the dough needs more time to rise, follow its appearance and texture rather than forcing it to match the clock.
Why You Will Love This Homemade Sourdough Loaf
This recipe uses straightforward ingredients but produces a loaf with plenty of character.
The bread flour provides structure, while the small amount of whole wheat flour adds a deeper, slightly nutty flavor. The sourdough starter naturally ferments the dough, helping it develop its familiar tang.
Another advantage is that the dough does not require constant attention. After mixing, you perform a few folds during the early fermentation stage and then leave it alone to develop.
The overnight cold proof is especially useful. You can prepare the dough one day, refrigerate it overnight, and bake it the next morning.
One important thing to understand is that sourdough is not exactly like commercial yeast bread. Temperature, starter activity, and fermentation time all affect the result. Once you learn to recognize a properly fermented dough, baking becomes much more predictable.
Ingredients for Sourdough Bread
You will need the following ingredients for one loaf.
- 100 g active sourdough starter
- 375 g warm water, approximately 75–80°F (24–27°C)
- 450 g bread flour
- 50 g whole wheat flour
- 10 g fine sea salt
For Dusting the Proofing Basket
- Rice flour
- All-purpose flour
A digital kitchen scale is highly recommended. Measuring flour by weight makes it easier to repeat the recipe and maintain consistent results.
Choosing the Right Sourdough Starter
Your starter should be active and bubbly before you mix the dough. If you feed it and it consistently rises to around double its original size before beginning to fall, that is a useful sign that it is ready.
A starter that has been sitting in the refrigerator for a long time may need one or more feedings at room temperature before baking.
Do not rely on bubbles alone. A starter can contain bubbles but still be too weak to raise a loaf properly. Look for a noticeable rise after feeding and a pleasant, mildly tangy or fermented smell.
What Each Ingredient Does
Bread flour: Provides the gluten structure that helps the loaf hold its shape and trap fermentation gases.
Whole wheat flour: Adds flavor and color. It also absorbs water differently from white bread flour.
Water: Hydrates the flour and allows the dough to develop. The dough should feel slightly sticky rather than dry.
Sourdough starter: Supplies the microorganisms responsible for fermentation and the characteristic sourdough flavor.
Salt: Enhances flavor and helps regulate fermentation.
Equipment You Will Need
Gather everything before starting so you do not have to search for tools while handling the dough.
- Digital kitchen scale
- Large mixing bowl
- Dough whisk or clean hands
- Bench scraper
- Proofing basket, also called a banneton
- Clean kitchen towel or reusable cover
- Sharp bread lame or razor blade
- Parchment paper suitable for your baking temperature
- Dutch oven with a lid
- Wire cooling rack
- Serrated bread knife
If you do not have a banneton, a medium-sized bowl lined with a clean, well-floured kitchen towel can work. Make sure the bowl supports the dough without squeezing it too tightly.
How to Make Sourdough Bread Loaf
Step 1: Prepare the Active Starter
Start by preparing enough active starter for the recipe.
In a clean jar, combine:
- 20 g sourdough starter
- 100 g warm water
- 100 g bread flour
Stir until the flour is fully hydrated. Cover the jar loosely and leave it at room temperature.
Wait until the mixture has risen significantly, ideally doubled, and looks bubbly throughout. Depending on the temperature of your kitchen and the strength of your starter, this can take several hours.
You only need 100 g of the prepared starter for the bread recipe. Keep and maintain the remaining starter according to your usual feeding routine.
Helpful tip: Mark the starting level on the jar with a rubber band. It makes the rise easier to see, particularly if you are new to sourdough baking.
Step 2: Mix the Flour and Water
Add 450 g bread flour and 50 g whole wheat flour to a large mixing bowl.
Pour in the 375 g warm water. Mix with your hands or a dough whisk until there are no obvious dry patches of flour.
At this stage, the dough may look rough, lumpy, and uneven. That is completely normal. You are not trying to create a smooth ball yet.
Cover the bowl and let the mixture rest for 30–60 minutes.
This resting period allows the flour to absorb the water and begins developing the dough’s structure. It also makes the dough easier to handle during the following steps.
Avoid adding extra flour simply because the mixture feels sticky. Too much additional flour can make the finished bread dense.
Step 3: Add the Starter and Salt
Add 100 g of your active sourdough starter to the rested dough.
Wet your hands slightly and pinch the starter into the dough. Fold and squeeze gently until the starter is distributed throughout the mixture.
Let the dough rest for approximately 30 minutes.
Next, sprinkle 10 g fine sea salt over the dough. If it is difficult to incorporate, dissolve the salt in a very small amount of reserved water before adding it.
Use your fingers to pinch, fold, and squeeze the dough until the salt is evenly mixed in.
The dough may feel sticky and somewhat loose. That does not mean you have made a mistake. It will become stronger as fermentation and folding continue.
Step 4: Begin Bulk Fermentation
Cover the bowl and leave the dough at room temperature for approximately 4–6 hours.
This stage is called bulk fermentation. During this time, the starter ferments the dough, produces gas, and develops flavor.
The time can vary considerably. A warm kitchen may speed up fermentation, while a cool room may slow it down.
During the first 2–3 hours, perform a series of folds approximately every 30 minutes. After the initial folding period, let the dough continue fermenting undisturbed.
How to Perform a Coil Fold
- Wet your hands to prevent the dough from sticking excessively.
- Slide both hands underneath the center of the dough.
- Lift the dough gently until the middle rises.
- Allow the ends to fold underneath themselves.
- Turn the bowl slightly and repeat.
- Continue around the dough until it has been folded from several sides.
Perform the movement gently. Pulling too hard can tear the dough instead of strengthening it.
After several rounds, the dough should feel more elastic and hold its shape better.
How to Tell When Bulk Fermentation Is Complete
Do not depend on the clock alone. Look for these signs:
- The dough has increased in volume, often around 30–50% for this method.
- The surface looks smoother and slightly domed.
- Small bubbles are visible along the sides of the bowl.
- The dough feels lighter and more aerated.
- The dough jiggles gently when you move the bowl.
If the dough still looks dense and has barely increased in size, it probably needs more fermentation time.
On the other hand, if it becomes extremely loose, very bubbly, and difficult to handle, it may have fermented too far. The goal is a dough that feels airy but still has enough strength to be shaped.
Step 5: Pre-Shape the Dough
Lightly dust your work surface with flour.
Use a bench scraper to ease the dough out of the bowl. Try not to pull or tear it unnecessarily.
Bring the edges toward the center and gently shape the dough into a loose round. Avoid pressing out all the air because those trapped gases help create an open, light crumb.
Let the dough rest uncovered for 20–30 minutes.
This short rest allows the gluten to relax, making the final shaping easier.
If the dough spreads a little during this period, that is not necessarily a problem. However, if it becomes completely flat and soupy, you may need to review your fermentation and folding technique next time.
Step 6: Shape the Final Loaf
Lightly flour the top of the dough and turn it over so the floured side rests against the work surface.
Fold the bottom section toward the middle. Bring the sides inward, then fold the top section toward the center.
Continue folding and rolling gently until you create a round loaf with a smooth outer surface.
Use a bench scraper to pull the dough toward you across the counter. This creates surface tension, which helps the loaf maintain its shape during proofing and baking.
The trick is to create a smooth, supportive outer layer without squeezing the dough too aggressively.
If the dough sticks to the counter, use a small amount of flour where necessary, but avoid covering the entire dough in excess flour. Too much flour can prevent the folds from sticking together properly.
Step 7: Transfer the Dough to a Proofing Basket
Mix rice flour with a little all-purpose flour and dust the inside of your banneton generously.
Rice flour is particularly useful because it tends to absorb moisture differently from wheat flour and can help reduce sticking.
Carefully lift the shaped loaf and place it in the basket seam-side up.
Cover it with a clean kitchen towel or reusable proofing cover.
If you are using a bowl lined with a towel instead of a banneton, make sure the towel is well dusted with the flour mixture. Pay attention to the center of the bowl, where the dough is most likely to stick.
Step 8: Cold-Proof the Dough Overnight
Place the covered basket in the refrigerator for 12–16 hours.
This stage is known as cold proofing. The low temperature slows fermentation while allowing the dough to continue developing flavor.
Cold dough is also firmer and generally easier to score than warm, soft dough.
You can bake the loaf straight from the refrigerator the next morning.
Remember that refrigeration slows fermentation rather than stopping it instantly. The dough’s condition before refrigeration still matters. If it was significantly under-fermented when you placed it in the refrigerator, an overnight rest may not completely correct the problem.
Step 9: Preheat the Oven and Dutch Oven
Place your Dutch oven, including its lid, inside the oven.
Preheat to 475°F (245°C) for at least 45 minutes.
A thoroughly heated Dutch oven helps the dough expand quickly during the early part of baking. Its lid traps steam released from the dough, allowing the crust to remain flexible long enough for the loaf to rise.
Be careful when handling the hot cookware. Use dry, heat-resistant oven mitts and keep the Dutch oven on a stable, heat-safe surface.
If your Dutch oven has manufacturer temperature restrictions, follow those instructions.
Step 10: Score the Dough
Remove the cold dough from the refrigerator.
Place parchment paper on your work surface and carefully turn the dough onto it.
Using a sharp bread lame or razor, make one confident slash across the top. An angled cut can encourage the crust to open along the cut and form an attractive ear.
You can add a few small decorative cuts if you prefer a patterned loaf.
Avoid repeatedly dragging a dull blade across the dough. A clean cut gives the loaf a better chance of expanding in a controlled way.
Keep your fingers away from the blade, and use a proper bread-scoring tool whenever possible.
Step 11: Bake the Sourdough Bread
Carefully transfer the scored dough, together with the parchment paper if suitable for your baking temperature, into the hot Dutch oven.
Cover with the lid and bake for 25 minutes at 475°F (245°C).
After 25 minutes, remove the lid and reduce the oven temperature to 450°F (230°C).
Continue baking for another 20–25 minutes, or until the crust is a deep golden brown.
If you enjoy a darker, crunchier crust, you can bake it a little longer while watching closely to avoid burning.
The loaf should feel firm when handled with oven mitts, and the crust should be well colored rather than pale. If you have an instant-read thermometer, the center of a fully baked loaf is commonly around 205–210°F (96–99°C), although temperature should be considered alongside crust color and baking time.
Do not worry if the loaf does not look perfectly symmetrical. Handmade sourdough often has its own character.
Step 12: Cool Completely Before Slicing
Remove the loaf from the Dutch oven and place it on a wire cooling rack.
Let it cool for at least 3–4 hours before slicing.
This is one of the hardest parts of the process because the smell of freshly baked bread makes you want to cut into it immediately.
However, the inside of the loaf continues to set as it cools. Slicing too early can release steam and leave the crumb sticky or gummy.
Once the bread has cooled, use a serrated bread knife to cut even slices.
You should have a loaf with a crisp crust, a soft and chewy center, and a gentle sourdough flavor.
Practical Tips for Better Sourdough Bread
Use a Strong, Active Starter
A starter that has not developed enough activity may produce a loaf that rises slowly or remains dense.
Feed your starter before baking and observe how quickly it rises. Learning its usual pattern is more helpful than following a fixed number of hours.
Watch the Dough Instead of Following the Clock Blindly
Fermentation depends on temperature, starter strength, flour, and dough handling.
If your kitchen is warm, the dough may be ready earlier than expected. If your kitchen is cool, it may take longer.
The signs of fermentation are more useful than a timer alone.
Do Not Keep Adding Flour to Sticky Dough
Sourdough dough is naturally tacky, especially during the early stages.
Wet your hands, use a dough scraper, and give the flour time to absorb the water. Adding too much flour can change the hydration and make the loaf heavier.
Do Not Skip the Folding Stage
Folding strengthens the dough without the need for extended kneading.
A few gentle rounds can make a noticeable difference in how well the dough holds its shape. Once the dough becomes stronger, stop folding and allow fermentation to continue.
Preheat the Dutch Oven Properly
Putting the dough into a Dutch oven that has not heated fully can affect the loaf’s oven spring and crust development.
Allow sufficient preheating time, and use care when transferring the dough.
Let the Bread Cool Fully
A beautiful crust does not automatically mean the inside is ready to slice.
Waiting several hours helps the crumb finish setting and makes cleaner slices possible.
Common Sourdough Bread Problems and How to Fix Them
Why Did My Sourdough Dough Not Rise?
The starter may have been weak, or the dough may have fermented in a cool room.
Feed the starter regularly before baking and allow the dough more time if it shows little activity. Check for an increase in volume and bubbles before moving to the next stage.
Why Did My Loaf Turn Out Flat?
A flat loaf can result from insufficient gluten development, over-fermentation, under-fermentation, or weak shaping.
Try performing the folds more consistently and creating better surface tension during final shaping. Also check whether the dough became excessively loose before shaping.
Why Is the Inside of My Bread Gummy?
Gummy bread can result from slicing while the loaf is still warm, insufficient baking, or fermentation and dough-structure problems.
Allow the loaf to cool completely. Make sure the crust develops enough color during baking, and check the center temperature if possible.
If the bread remains gummy even after cooling, review your fermentation process as well.
Why Is My Crust Pale?
The oven or Dutch oven may not have been hot enough, or the uncovered baking stage may have been too short.
Preheat thoroughly and allow the loaf to bake uncovered until the crust reaches your preferred color.
Why Is the Crust Too Thick or Hard?
An extended uncovered baking time can produce a particularly thick, dark crust.
If the crust is harder than you prefer, reduce the uncovered baking time slightly on your next attempt while making sure the loaf is fully baked.
Why Did the Dough Stick to the Banneton?
Insufficient dusting is a common cause. Moist dough can cling tightly to the basket or cloth.
Use a generous coating of rice flour mixed with all-purpose flour. Make sure the seams and sides of the basket are covered, not just the bottom.
How to Store Homemade Sourdough Bread
Allow the loaf to cool completely before storing it.
For short-term storage, keep the bread in a paper bag, bread box, or suitable bread bag at room temperature. The best option depends on whether you prefer a crisp crust or a softer exterior.
Avoid sealing warm bread in a plastic bag because trapped moisture can soften the crust.
Homemade sourdough generally keeps its best texture for the first couple of days. As it ages, the crumb may become firmer and the crust less crisp.
Can You Freeze Sourdough Bread?
Yes. Freezing is an easy way to preserve leftover bread.
- Let the loaf cool completely.
- Slice it into portions.
- Place the slices in a freezer-safe bag or container.
- Remove excess air and seal the package.
- Freeze and use the slices as needed.
Individual slices can go straight into a toaster if the appliance supports frozen bread. Alternatively, thaw them and warm them briefly in the oven.
Freezing slices also makes it easier to avoid wasting a loaf when you live in a small household or do not eat bread every day.
Best Ways to Serve Sourdough Bread
One reason I like this style of bread is its versatility. The slightly tangy flavor works with both sweet and savory toppings.
Here are some easy serving ideas:
- Butter and sea salt: A simple choice that lets the bread’s flavor stand out.
- Scrambled or fried eggs: Serve toasted sourdough alongside breakfast.
- Avocado: Add mashed avocado, black pepper, and a little lemon juice.
- Cream cheese: Spread it on a fresh slice for a quick snack.
- Soup: Use thick slices to accompany vegetable soup or a hearty stew.
- Grilled cheese: Sourdough makes a flavorful, crisp sandwich.
- Jam or honey: A good option for a sweet breakfast.
- Olive oil and herbs: Serve toasted slices with a small dish of seasoned olive oil.
- Homemade croutons: Cut older bread into cubes, season, and bake until crisp.
If the loaf becomes a little stale, do not throw it away immediately. Toasting often brings back a pleasant texture, and leftover slices can be used in breadcrumbs or croutons.
Frequently Asked Questions
1. Can I make sourdough bread without a Dutch oven?
Yes. A Dutch oven is helpful but not essential. You can bake sourdough on a preheated baking stone or sturdy baking sheet. A suitable covered baking vessel can also help retain moisture. If using a separate steam method, follow your oven manufacturer’s safety instructions and never pour water onto hot glass or an oven surface that is not designed for it.
2. Can I use all-purpose flour instead of bread flour?
You can try all-purpose flour, but the dough may behave differently because protein levels vary between brands. The loaf may have a softer structure or spread more during shaping. Start with the recipe as written if you are learning, then experiment with substitutions once you understand the dough.
3. How do I know when my sourdough starter is ready?
A ready starter usually rises noticeably after feeding, develops bubbles throughout, and has a pleasant fermented smell. Many starters reach their peak when the surface is slightly domed or just beginning to flatten. The exact timing depends on temperature, feeding ratio, and starter health.
4. Can I leave the dough in the refrigerator longer than 16 hours?
Sometimes, but longer refrigeration can increase sourness and may lead to over-proofing, depending on how far fermentation progressed before chilling and how cold your refrigerator is. For your first attempt, stay close to the suggested 12–16-hour window and adjust based on your results.
5. Why is my sourdough not very sour?
Flavor depends on the starter, fermentation conditions, flour, and proofing time. A mild loaf is perfectly normal. The cold proof in this recipe helps develop flavor, but it does not guarantee a sharply sour taste.
6. Can I prepare sourdough bread in one day?
Yes, if your starter is ready and the dough ferments quickly enough. However, this recipe includes an overnight cold proof, so it is planned around preparing the dough one day and baking it the next. Do not shorten fermentation just to meet a schedule if the dough has not developed sufficiently.
7. How long should sourdough bread cool before cutting?
For this medium loaf, allow at least 3–4 hours. Larger loaves may benefit from additional cooling time. Waiting helps the crumb finish setting and reduces the chance of a gummy interior.
8. Is a kitchen scale necessary?
A scale is not absolutely required, but it is strongly recommended. Flour measurements using cups can vary depending on how tightly the flour is packed. Weighing ingredients in grams makes the recipe easier to repeat and troubleshoot.
Final Thoughts
Making a good sourdough loaf is less about complicated equipment and more about learning how dough behaves. The first loaf may not have the exact shape or open crumb you imagined, and that is part of the learning process.
Start with an active starter, measure your ingredients carefully, perform the folds gently, and give fermentation enough time. A well-heated Dutch oven and a patient cooling period also make a meaningful difference.
Once you become familiar with the texture of properly fermented dough, the steps start to feel much more natural.
This homemade sourdough bread loaf is a useful recipe to keep in your baking routine. Serve it fresh with butter, toast it for breakfast, or freeze individual slices for later. With a little practice, you can develop a reliable method that suits your kitchen and produces delicious bread time after time.
